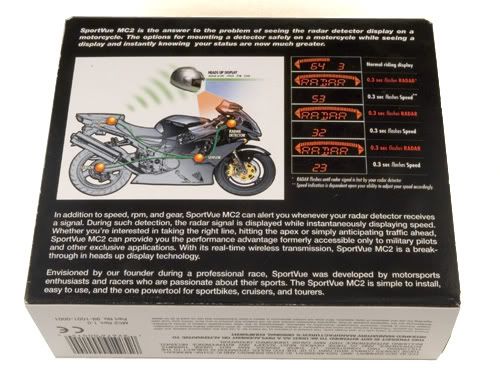
Heads-Up! SportVue MC2

Message
Author
User avatar
keysman
Site Supporter - Platinum
Posts: 544
Joined: Tue Dec 09, 2003 4:42 am
Sex: Male
Location: Northern California

Heads-Up! SportVue MC2

#1 Unread post by keysman »

Product: SportVue MC2
Product Type: Motorcycle Electronics
Manufacturer: Motion Research
URL: http://www.sportvue.com
Product Rating: 8 out of 10
Price: $349.00

Image

The good people at Motion Research Corporation, the makers of the SportVue motorcycle heads-up display system, recently sent me their SportVue MC2 system for evaluation. In this review, I hope to provide you with a thorough evaluation of the SportVue MC2 features, it's installation and operation. This review will broken down into a few parts that I will post over the next week or two. First up is an introduction and background on the SportVue heads-up display system, so let's dive in.

Image Image

Motion Research Corporation has recently updated their already popular SportVue Heads-Up display system for motorcycle riders. The SportVue display system mounts to your full-face helmet providing you, the rider, a view of your speed, RPM, gear position and now the new SportVue MC2 adds radar detection feedback when coupled with your existing radar detector. The information appears in a helmet-mounted display, focused near infinity allowing you to keep your eyes focused on the road while still being able to read all this important data.

Heads-Up Display technology was originally developed for use in military aviation. First developed for fighter jets and then later for helicopter pilots Heads-Up Displays or HUDs provide a measurable advantage in the cockpit where information overload is a real issue. Heads-Up Displays project information on to a largely transparent display in essence superimposing the data over the users normal field of view. The information displayed in a HUD is focused at or near infinity allowing the user to view the data without having to refocus his or her eyes.

Fighter jets are commonly outfitted with a clear glass element located between the pilot and the cockpit glass. The HUD uses a CRT or another type of display to project the data or information onto this glass element. Alternative systems use the pilots visor as the display element. Visor mounted systems have an advantage by allowing the information to remain in your field of view as you turn your head. The SportVue from Motion Research is a visor mounted system.

Image Image

The SportVue, originally developed for racing enthusiasts, displays a continuously updating view of your speed, gear position and RPM in the Heads-Up Display. The new MC2 variant adds the ability to interface with popular radar detectors providing you with a visual radar warning message when your radar detector senses the presence of a radar signal. In addition to these standard features the SportVue also includes a programmable shift light as well as programmable tire size for accurate speed indication. The wireless Heads-Up Display mounts to your helmet with a break-away mounting clip. The display runs off of 2 standard AAA batteries and features both a 2-stage display booster for low-light conditions and an ambient light system for brighter days and extended battery life.

Image Image

The SportVue Kit consists of three small, lightweight components. The Head Mounted Display Unit or HMD as it's called, houses the Heads-Up Display. This component is mounted to your helmet in the break-away clip. Also included is the Motorcycle Sending Unit or MSU. The MSU is the brains of the unit and mounts to your motorcycle. The MSU captures the speed and RPM from your motorcycle and from that information is able to calculate your gear position. The MSU processes the data and sends the information to the Head Mounted Display (HMD) through a wireless link. Finally there is a wiring harness that connects the Motorcycle Sending Unit (MSU) to a wheel speed sensor and a RPM sensor. The wiring harness also has power and ground leads for connecting the MSU to your bikes 12-Volt power. The SportVue MC2 adds an additional wiring harness to connect to your radar detector's audio output. This connection provides the radar alert signal to the SportVue.

Image Image

Up next, I'll walk you through the steps for installing the SportVue system on a motorcycle.

Note: Most of the images in this review are linked to larger photos.
Last edited by keysman on Fri May 12, 2006 6:15 pm, edited 3 times in total.
New Hotness: 2005 Yamaha FJR1300
Old & Busted: 2003 BMW F650CS

User avatar
totalmotorcycle
Administrator
Administrator
Posts: 29679
Joined: Sat Nov 22, 2003 1:00 pm
Real Name: Mike
Sex: Male
Years Riding: 32
My Motorcycle: 2013 Moto Guzzi V7 Stone
Location: Winnipeg, Manitoba

#2 Unread post by totalmotorcycle »

Great first part of the review! I look forward to reading the second (and further) parts. Excellent job. :D

I am interested to see how it all hooks up to the helmet and motorcycle. It definately has more parts than I thought it would have, but it does so much(RPM, speed, radar detection etc).

I found it amazing that you can input your tire size to have an accurate read out of your speed. Can you choose ANY tire size or is there a list of tire sizes?

Loved the photos too, they add a lot of interest to the review!

Have fun riding out there testing it, it is below freezing here now with snow all around.

:cold:

Mike.
NEW 2024 Motorcycle Model Guides
2023 Motorcycle Model Guides

Total Motorcycle is official Media/Press for Aprilia, Benelli, Beta, Bimota, BMW, Brammo, Buell, Can-Am, CCW, Ducati, EBR, Harley-Davidson, Honda, Husqvarna, Husaberg, Hyosung, Indian, Kawasaki, KTM, KYMCO, LiveWire, Moto Guzzi, Moto Morini, MV Agusta, Norton, Phantom, Piaggio, Polaris, Ridley, Roehr, Royal Enfield, Suzuki, Triumph, Ural, Vespa, Victory, Yamaha and Zero.

User avatar
Scoutmedic
Site Supporter - Gold
Posts: 1627
Joined: Wed May 18, 2005 9:05 am
Real Name: Barry
Sex: Male
Years Riding: 7
My Motorcycle: 2003 Honda Gold Wing
Location: Corry, Pennsylvania

Awesome...

#3 Unread post by Scoutmedic »

Awesome looking product. Can't wait for the rest of the review. Definitely something to consider.

User avatar
keysman
Site Supporter - Platinum
Posts: 544
Joined: Tue Dec 09, 2003 4:42 am
Sex: Male
Location: Northern California

#4 Unread post by keysman »

Hey Mike, according to the manual you can input your tire size down to the tenth of an inch!

I wanted to let everyone know that SportVue is running a promotion right now on the MC1 and the MC2. $80.00 off the MC1 (without radar detection support) and $90.00 off the MC2 (includes radar detector connection). Making the MC1 $249.00 and the MC2 $299.00. This is a very good deal for all the capabilities that this device has. This offer is good until December 31, 2005.

I hope to have the next part of the review posted by the end of the weekend so check back soon.
New Hotness: 2005 Yamaha FJR1300
Old & Busted: 2003 BMW F650CS

User avatar
keysman
Site Supporter - Platinum
Posts: 544
Joined: Tue Dec 09, 2003 4:42 am
Sex: Male
Location: Northern California

Part 2 - The Installation

#5 Unread post by keysman »

Product: SportVue MC2
Product Type: Motorcycle Electronics
Manufacturer: Motion Research
URL: http://www.sportvue.com
Product Rating: (Will be posted when testing is complete.)
Price: $389.00 - On Sale for $299.00 until December 31, 2005

Image

Part 2 - Installing the SportVue MC2 System

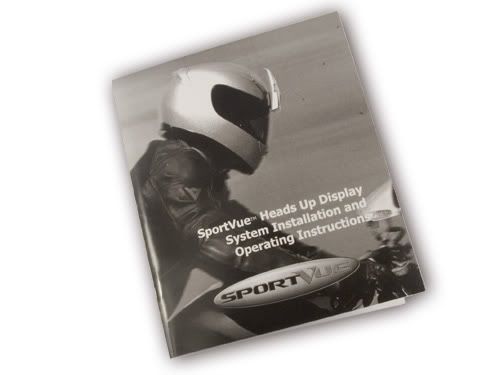
First I would like to offer a few words of advise to those of you who decide to get a SportVue MC2 for yourselves. The owners manual that is provided does a good job of documenting the installation, configuration and operation of the SportVue. I suggest you look over the manual before you ever begin installing the hardware on your helmet and your bike. The process is not hard but I'm sure you will find the process quite a bit easier if you have a clear picture of what is involved before you get started. Once you have looked over the instructions I would suggest you go back and re-read each step as you go through the install. As long as you take your time you should not have any problem installing the SportVue yourself.

Before you begin the installation you need to find out which of your eyes is dominant. The SportVue is designed to work best when the Head Mounted Display or HMD is positioned above your dominant eye. The manual outlines a rather simple procedure you can complete in your home in a matter of minutes. Once you have determined your dominant eye you can begin the process of installing the HMD on your helmet. Two mounting clips are included with the kit. I selected the left eye mounting clip based on my left eye dominance. The two clips are very similar however one will fit the curvature of your helmet visor on the left and the other will fit the right side.

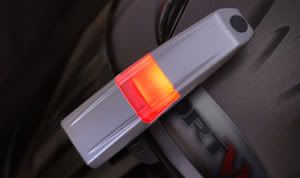
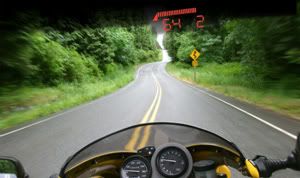
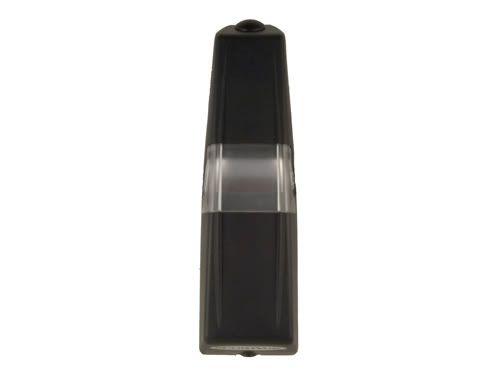
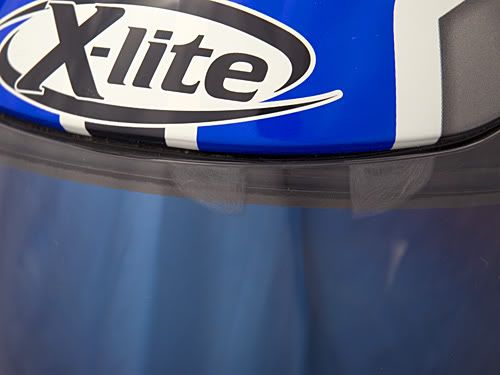
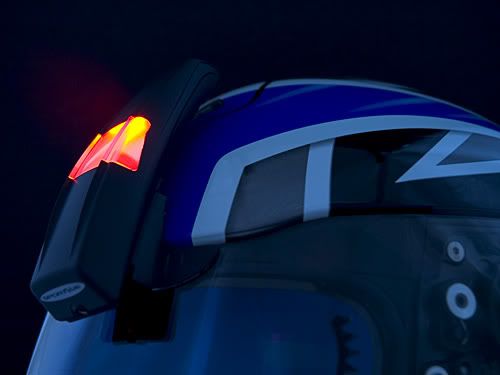
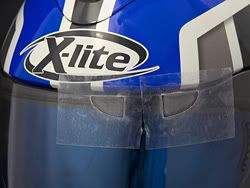
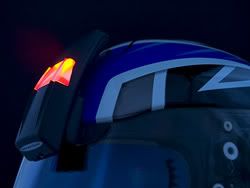
First you install the two AAA batteries that are provided with the kit into the Head Mounted Display or HMD. Next you place the HMD into the mounting clip you have selected. You're not ready to install anything permanently at this point. You'll just be testing the positioning of the HMD. In order to position the HMD you will need to sit on your motorcycle with your helmet on and adjust the HMD until it is properly in your field of view. Take your time with this step, make sure you get it aligned properly and be certain you're happy with the position before you move on. It's best if you have someone to help you with this and the next few steps. When you sit on your bike try to sit in a natural position for your riding style. Correct positioning will put the HMD unit just above your normal field of view while looking out at the road ahead. You should only have to barely glance upwards to see the display. When your finding the right position you will want to have the HMD powered on and you will want to make sure that the display is not cut off top to bottom or left to right. Making left to right adjustments is done by sliding the HMD along the top edge of your helmet visor. Top to bottom adjustments are made by using a tiny allen wrench that is provided with the kit. Be sure you keep the mounting clip pressed against the visor while your making adjustments. Once you think you have the HMD in the correct location check again to make sure that you are still sitting in a natural riding position before marking the final location. Once you have everything situated, carefully mark the location on your visor using a fine point permanent marker. Don't worry you won't be able to see that mark after you complete the next step. If you need to make minor top to bottom adjustments after you have attached the HMD mounting clip you will be able to do that so top to bottom placement is not as critical as left to right positioning.

Image

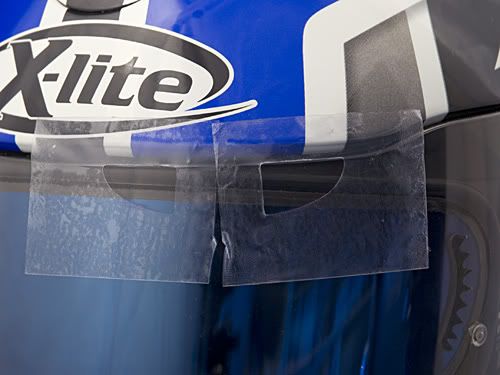
Next you will need to prepare the surface of your helmet visor to attach the mounting clip. The kit comes with a sanding mask and some sandpaper to scuff the surface of your helmet visor in the location where the mounting clip will attach with adhesive pads. Scuffing the surface of the visor is required ensure the mounting clip will retain a firm attachment to the surface of the visor. Once you peel the adhesive backing off the sanding mask you can stick it to your visor in the position you previously marked with your marker. When you have the sanding mask in position I suggest you check to make sure that the mounting clip lines up correctly before you begin sanding. I ended up cutting the sanding mask in half to allow for easier positioning.

Image Image

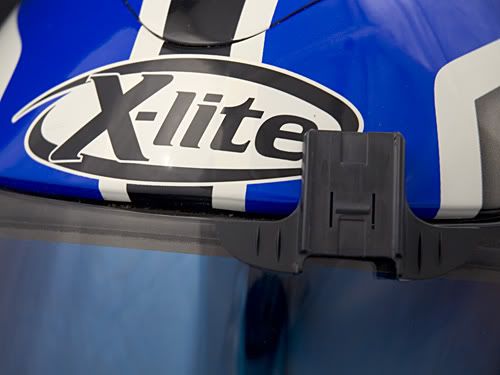
When the mask is in place and you have checked to make sure the mounting clip will line up you can begin sanding the visor surface. The sanding mask will prevent you from scuffing areas you didn't intend to sand but still use caution while you sand. Once you have sanded the entire area in the openings of the sanding mask you will need to clean the surface of the visor with one of the supplied alcohol pads. Finally remove the sanding mask and install the mounting clip according to the instructions.

Image Image

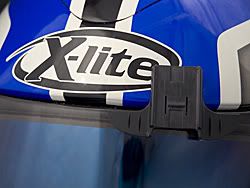
When the clip is mounted to your visor, place the Head Mounted Display back in the clip and place your helmet back on your head and re-check the positioning. If you need to make any adjustments do them now. When your satisfied put your helmet on the shelf for 24 hours to allow the pressure sensitive adhesive on the mounting clip to properly bond to your visor. Let's face it you don't want your heads-up display flying off when breezing down the highway.

Image Image

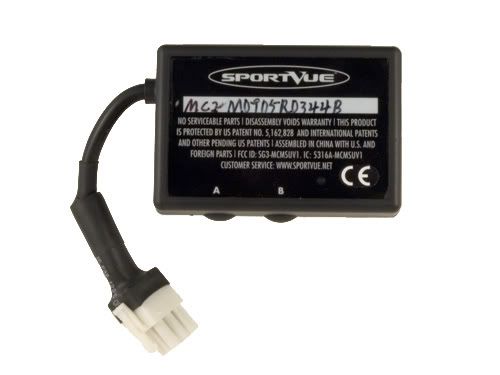
Now that you have the Head Mounted Display behind you it's time to begin installing the Motorcycle Sending Unit or MSU on your bike. Before you begin this part of the process jump on your computer and head over to the SportVue website at www.sportvue.com and take a look at the motorcycle instruction database Motion Research has provided. You will find a number of late model bikes broken down by make and model. If your bike is listed you will be able to download and print out a supplemental guide with specific instructions on installing the MSU on your bike. I currently ride a 2005 Yamaha FJR 1300 ABS and I found the extra instructions quite helpful.

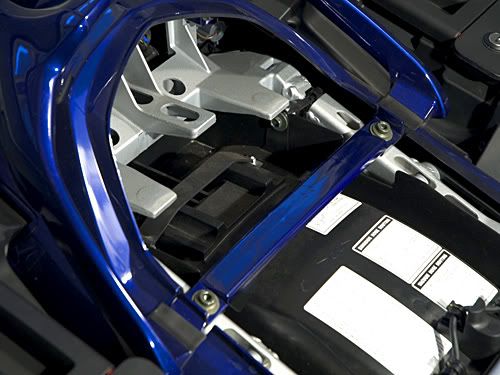
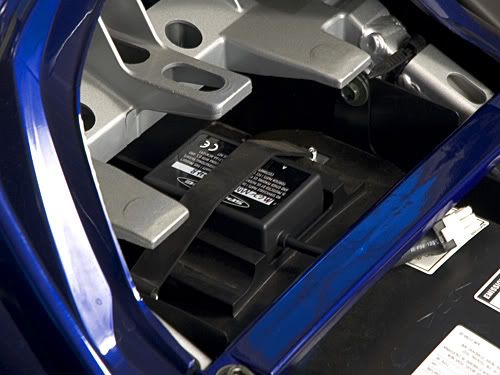
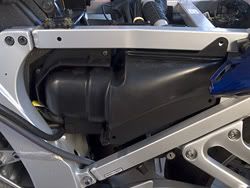
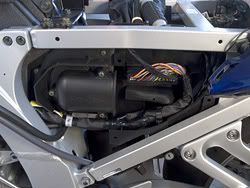
Before you begin installing the MSU you will need to find a suitable mounting location. The instruction manual recommends a location inside a fairing, under the seat or near the rear of the motorcycle. I found the location recommended by the guide supplement online to be a prefect fit for my installation, under the passenger seat and near the rear of the motorcycle. The FJR even has a rubber tie-down strap that I was able to use to secure the MSU in place. It was almost as if the MSU was made to fit in this location. If your bike is something other than the Yamaha FJR the kit includes both tie-wraps and a patch of Velcro to secure the MSU.

Image Image

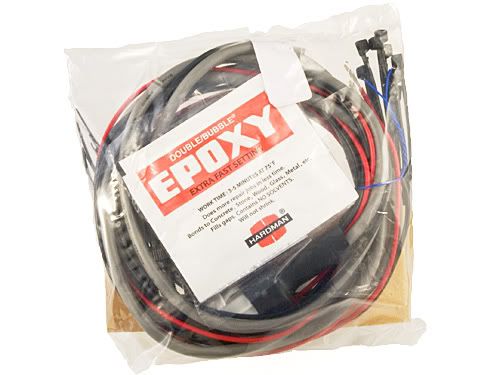
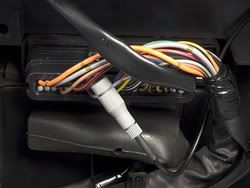
Once the Motorcycle Sending Unit is in place it's time to attach the wiring harness by plugging it into the MSU. The wiring harness has four wires, a wheel speed sensor cable, a red 12 volt power lead, a black 12 volt ground lead, and a black coaxial wire for the RPM signal input. The kit also includes an assortment of connectors and accessories allowing you to achieve a clean professional looking installation.

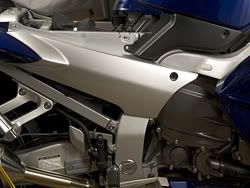
The first wire to route is the wheel speed sensor. The owners manual strongly suggests you mount the wheel speed sensor to the rear wheel. I was able to find a suitable location on my rear wheel with no problem. Routing the wire and keeping it hidden meant that I needed to remove a few pieces of plastic from my bike first. This task was accomplished without too much trouble.

Image Image

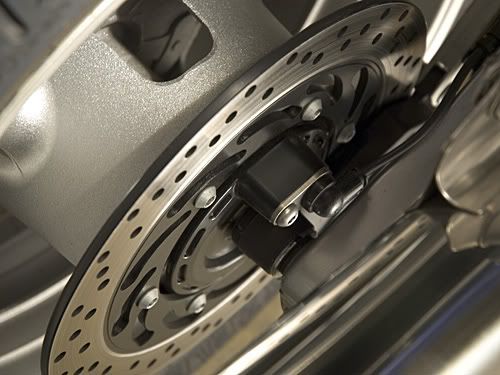
When you have the cable and the sensor routed to your rear wheel you will need to select one of the mounting brackets included with the kit to mount the wheel sensor close to the rear wheel. I used a bracket with two 90 degree right angles. I took some extra time with the bracket and drilled another hole in the bracket where it would mount to a bolt that holds the ABS sensor for my rear wheel in place. I would have been able to install the sensor without this step but I wanted to place the bracket a little lower and closer to the support. This also allowed for a little bit better placement of the magnet on the rear wheel hub on my bike.

Image Image Image

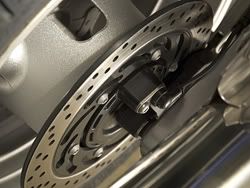
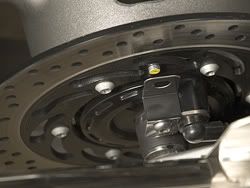
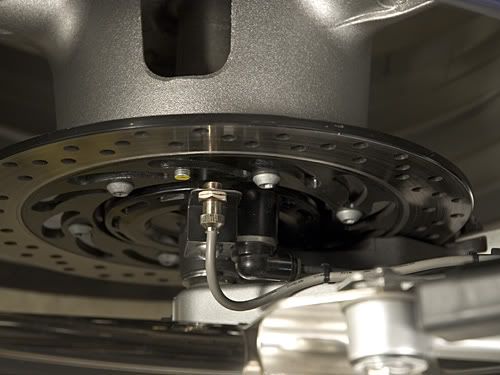
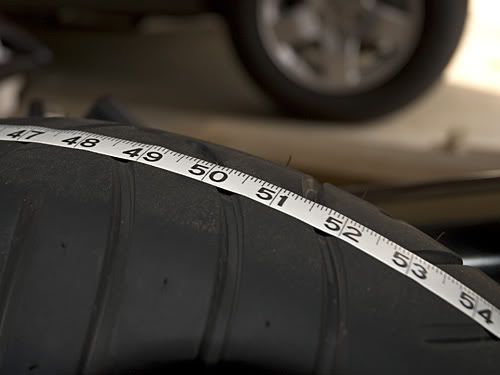
Once you have the sensor bracket installed you'll want to place the sensor in the bracket and then temporarily attach the magnet to the wheel. The magnet that is provided quite strong for it's size but you will still need to use the included epoxy to permanently attach the magnet to the wheel. The speed sensor is able to determine the speed of your motorcycle by counting the each time the magnet mounted to the wheel passes by the sensor. Later you will input the circumference of your rear tire allowing the MSU to properly calculate your speed. When you position the speed sensor and the magnet you need to make sure they pass within 1/4 inch of each other so here again take your time and make sure everything is lined up before making things permanent.

When you have the sensor in place and the magnet located, rotate the rear wheel around a few times by hand to make sure the magnet and the sensor will not come in contact with any moving parts on your wheel.

If it's not evident to you by now let me point out that you will need some means of getting your rear wheel off the ground in order to install this product. If your bike does not have a center stand you will need a service or paddock stand to support your bike and lift the rear wheel off the ground. Let me also point out that if you think you can get by without it, think again. You will need that rear wheel off the ground again later.

Next use the included epoxy to attach the magnet to the wheel according to the instruction manual. After the epoxy has begun to set you can secure the speed sensor by applying the included thread lock and tightening the jam nuts. If you find that your speed sensor can not be mounted in the typical location the instruction manual covers many alternate locations that may work better for your motorcycle.

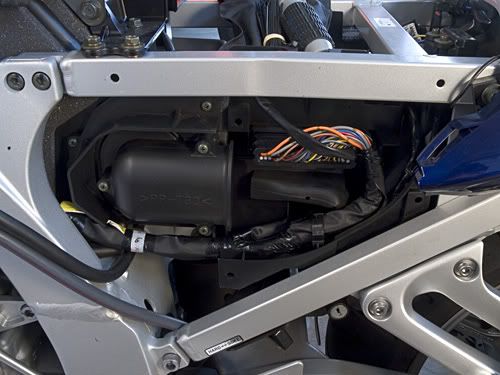
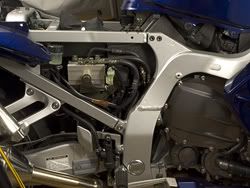
Next up is the RPM wire tap. Hang in there, we're almost done. The RPM wire tap needs to be located on your motorcycle's camshaft or crankshaft sensor. Older motorcycles may need a spark plug pickup wire accessory available from the SportVue website. On the FJR I was able to tap into the RPM sensor wire at the ECU. The supplemental guide I downloaded from the SportVue website included the information I needed to locate this wire with ease. Bravo to Motion Research for providing this information. Getting to my ECU wiring harness again required that I remove some plastic body panels from my bike. Once I gained access I tapped into the wire with one of the high quality wire taps included with the kit.

Image Image Image

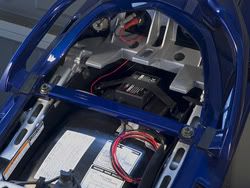
Okay, I promised we were almost done and this is it. We're down to the final step for installation, hooking up the power and ground wires for the MSU. You will need to locate a suitable power and ground wire in your bikes electrical system that is switched by your bikes ignition. I am planning to add a secondary fuse panel to my motorcycle and that is where I will ultimately connect the power and ground wires for the SportVue MSU but for now I just tapped into the tail lamp wiring as suggested in the supplemental manual I downloaded from the SportVue website.

Image

Now that you have all the parts installed and the wires routed make sure you go back and tidy up any loose wiring using the provided wire ties. Pay extra attention to the cable for the speed sensor, you wouldn't want the cable to come loose and get tangled up in your rear wheel. For me this step also included the reattachment of those few body panels that I removed earlier.

I hope you enjoyed this somewhat exhaustive look at how the SportVue MC2 kit is installed. If it seems overwhelming to you, don't worry. As I said before the manual that is provided with the kit is detailed and easy to understand. Take your time and be patient and if you get stuck Motion Research offers technical support to help you with any questions you might have. I also like to remind you that information I have provided here is by no means a substitute to reading the owners manual provided with the kit.

Up next I'll cover the configuration and operation of the SportVue MC2 and share with you some of my thoughts about the product.

Note: Most of the images in this review are linked to larger photos.
New Hotness: 2005 Yamaha FJR1300
Old & Busted: 2003 BMW F650CS

User avatar
totalmotorcycle
Administrator
Administrator
Posts: 29679
Joined: Sat Nov 22, 2003 1:00 pm
Real Name: Mike
Sex: Male
Years Riding: 32
My Motorcycle: 2013 Moto Guzzi V7 Stone
Location: Winnipeg, Manitoba

#6 Unread post by totalmotorcycle »

Awesome, wonderful, funny, insightful and I love it...

Encore!! Part 3!!

Mike.
NEW 2024 Motorcycle Model Guides
2023 Motorcycle Model Guides

Total Motorcycle is official Media/Press for Aprilia, Benelli, Beta, Bimota, BMW, Brammo, Buell, Can-Am, CCW, Ducati, EBR, Harley-Davidson, Honda, Husqvarna, Husaberg, Hyosung, Indian, Kawasaki, KTM, KYMCO, LiveWire, Moto Guzzi, Moto Morini, MV Agusta, Norton, Phantom, Piaggio, Polaris, Ridley, Roehr, Royal Enfield, Suzuki, Triumph, Ural, Vespa, Victory, Yamaha and Zero.

User avatar
keysman
Site Supporter - Platinum
Posts: 544
Joined: Tue Dec 09, 2003 4:42 am
Sex: Male
Location: Northern California

#7 Unread post by keysman »

Product: SportVue MC2
Product Type: Motorcycle Electronics
Manufacturer: Motion Research
URL: http://www.sportvue.com
Product Rating: (Will be posted when testing is complete.)
Price: $389.00 - On Sale for $299.00 until December 31, 2005


Image

Part 3 - Operation of the SportVue MC2 System

Configuration and Calibration

Configuring the SportVue system is a fairly straightforward process when you follow the detailed instructions in the owners manual. In order for the SportView to determine an accurate speed reading you must input your bikes rear tire circumference. I simply measured around the perimeter of my rear tire with cloth tape measure as per the instructions. I found it was easiest to just tape one end of the tape measure to the tire and measure around the largest part of my tire. (Did that make any sense? Tape the tape!?!) Once you know your tire circumference you input the measurement into the SportVue system following the instructions in the owners manual.

Image

The next part of the training process is allowing the SportVue system to determine the gear ratios for your bike. This is the part of the process that basiclly requires you to have a center stand or rear wheel pit stand. This isn't much of an issue for touring and sport touring riders as many of these bikes come equipped with a center stand but there are a number of bikes that do not include a center stand. This is the only requirement of the SportVue system that I feel could present a problem for some riders. If your bike does not have a center stand and you don't own a paddock stand, I suggest contacting other riders who may own a paddock stand or perhaps your local dealer or service center.

Setting the gear ratios involves running your bike through the gears as the SportVue Head Mounted Display prompts you for each gear in sequence while your bike is on the stand. Be very careful with this process, if your bike slipped off the stand you could quickly be sent through the wall in your garage and wind up in your living room. I don't think you or your wife would be too happy about that! Once you have completed this process your SportVue system is setup and ready to go.

The First Ride

After I was comfortable that I had completed all the installation and configuration steps properly it was of course time for a ride to give this new piece of technology a try. I backed my FJR out of the garage, down the driveway and onto the sidewalk as is my usual routine. I then began the process of outfitting myself with all of my riding gear. Pants and a jacket are required attire as is a shirt, but a tie is not in fashion for this outing. I pulled the helmet down over my ears, cinched up the straps under my chin, grabbed my gloves and pulled down the door to the garage.

Once I saddled up I ran through the battery of last minute checks in preparation for take off. Seat backs and tray tables in their fully upright and locked position... Check. We're ready for take off. I brought down the visor and powered up the heads up display. After a short series of self diagnostics by the MC2, the display showed a few bars on the tachometer, a zero for the speed and the letter N for the neutral gear position. My new automated copilot was also ready for departure.

The owners manual for the SportVue MC2 strongly suggests you do not allow yourself to be distracted by the heads up display. I want to reinforce that here because, even though I had read the warning I still found myself paying far to much attention to that little digital display in the upper left corner of my visor and far too little attention to the road ahead during my initial outing with the MC2 installed.

My destination for this trip was a local Yamaha dealer across town as I was in search of a small plastic fastener that seems to have sprouted legs and walked away during the process of installing the MC2. There always seems to be at least one defector seeking refuge in someone else's garage during these projects. I know this to be true because I have ended up with an extra part once or twice after completing a project. Those extras must have been seeking refuge in my garage, right? :D

As I rode through the city streets on my way to Interstate 5 I found myself looking at the display and comparing the information in my new heads-up unit to my bikes speedometer and tach. It's hard to gauge the accuracy of the SportVue's tachometer as it only displays your RPM as a graph across the top of the screen. Sensing engine RPM and shift points are based more on audible and tactile feedback for this rider. I doubt I would benefit from any more RPM detail from the SportVue anyway. My comparison of the MC2 indicated speed and the FJR's analog speedometer were much more insightful. The MC2 and the FJR were always in agreement about my rate of speed. I found that my bikes speedometer was always more optimistic about my speed than the SportVue consistently reporting a speed of about 1 mile-per-hour faster than the MC2.

It was late afternoon when I began my journey and heading West meant riding into the sun as our days are becoming shorter as we settle into the Autumn and Winter seasons. With the sun in my face I did find it difficult to focus and resolve the information in the heads-up display. I could still read the information but it took longer that an quick glance to distinguish the numbers that the SportVue was displaying. Once I made it to the freeway and headed North, the sun was positioned to my side making it much easier to read the display. I discovered that positioning of the SportVue can be somewhat critical. There is a smaller window than I expected for optimum readability. I found myself adjusting my helmet at stoplights and tilting my head up and down to test for the best position. The SportVue remained perfectly useable throughout but I was at least a little surprised by how small movements seemed to make big differences in the positioning of the heads-up display in my visor.

As I traveled down the freeway I found myself more relaxed about the operation of the SportVue and as a result better tuned into my riding. I began checking the heads-up display less and using the system more as intended. After a mile or two on the freeway a thought crept into my brain, "I wonder if this thing can display triple digits?" Of course in my mind I already knew it could but I could not subdue the temptation to see it with my own eyes. 97, 98, 99, 100, 101, look at that; It can display triple digits! As quickly as my experiment began I returned my FJR to speeds known to be more acceptable to the California Highway Patrol.

Once I reached the Yamaha dealer, I powered down the Head Mounted Display or HMD and headed inside. Without thinking about it I carried my helmet inside with me and placed it on the counter in the parts department. Almost immediately the SportVue began generating attention from the guys behind the counter. I found myself explaining the device and how it works. I suspect this might continue for some time to come as people ask, "What's that thing on your helmet?"

After searching for my plastic fastener and BS'ing for a while with the employees I headed back home. By this time the sun was really beginning to sink beyond the horizon. Part way home it began getting darker. Not having to look directly into the sun made it a lot easier to see the SportVue's display and made riding more comfortable overall.

I didn't spend too much time on this trip testing the different backlight settings on the HMD. I did cycle through the three modes a couple of times and found that I liked the brightest setting the best. The HMD backlighting is controlled by pressing the button which doubles for the power button on the HMD. When you power the unit on it will default to the brightest setting. Pressing the button once will keep the backlighting on but at about half the brightness. Pressing the button again will cycle the unit to a mode where the backlighting is off completely. The manual states that this mode is only suitable for the brightest days and I would have to agree.

This trip proved to be a good first run for testing the MC2. I had a good mix of riding conditions and lighting situations. My initial impression of the SportVue MC2 overall was a positive one. I did feel a little distracted by the unit at first but that quickly faded as I became more accustomed to seeing the HMD out of the corner of my eye. I think this is one of those products that takes a little time to become comfortable using. I will follow up on this after I have a little more time to use the product.

I want to share a couple more things I observed while using the SportVue. First is that while shifting gears the HMD may indicate the wrong gear for just a second or two. The SportVue system calculates the gear based on your bikes speed and RPM. When you pull in the clutch your RPM will drop temporarily causing the SportVue to display a higher gear. I suspected this was normal but I contacted Motion Research and they confirmed that it was in fact, normal. The SportVue system is designed to supplement your bikes gauges, not replace them. Watching the numbers change as you shift gears isn't necessarily the best place for your eyes to be focused anyway.
Last edited by keysman on Fri Jul 17, 2009 4:03 am, edited 1 time in total.
New Hotness: 2005 Yamaha FJR1300
Old & Busted: 2003 BMW F650CS

User avatar
DieMonkeys
Legendary 500
Legendary 500
Posts: 702
Joined: Tue Apr 11, 2006 11:34 am
Real Name: Mick
Sex: Male
Years Riding: 10
My Motorcycle: 2015/Kawasaki/Versys 650 LT
Location: Decorah, IA

#8 Unread post by DieMonkeys »

So.... how does it work?
[img]http://content.ytmnd.com/content/8/c/f/8cfad8ebc281805945b49541a1f00d48.gif[/img]
1980 Suzuki GS550E "Miranda" (Retired)
1986 Honda Nighthawk CB700SC "Valarie"

User avatar
isnowbrd
Legendary
Legendary
Posts: 289
Joined: Mon Oct 11, 2004 5:34 am
Sex: Male
Location: Minnesota

#9 Unread post by isnowbrd »

My brother-in-law has this sportvue heads up display. Based on his experiences with it and my own impressions, the following review article is spot on. --> http://www.bikeland.org/articles/sportvuetest.pdf

I would suggest reading it before you decide to purchase.
ZZR600
VTR250 - Nothing quite like your first love

User avatar
keysman
Site Supporter - Platinum
Posts: 544
Joined: Tue Dec 09, 2003 4:42 am
Sex: Male
Location: Northern California

#10 Unread post by keysman »

I never said it was perfect but I give the product more credit that the other linked review. One thing about that review that is false is that you have to run your bike up to 150 mph. I did not have to run it up to anywhere near those speeds to calibrate the system. I think the reviewer made a mistake on that part.
New Hotness: 2005 Yamaha FJR1300
Old & Busted: 2003 BMW F650CS

Post Reply