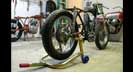

Well, one week turns into 3, but my wheels are done… sorta:
Welcome to High5Cycles:

worth the trip just to hang out with the staff and the smoking hot owner (:
but I’ve got other things on my mind, when I walk up at about 5pm after work, the front’s done:


Looking lovingly oldskool
After a couple hours kicking around the shop chatting a bit. I get to sit in and watch “D” build my rear, at which point I’m glad they weren’t able to get to it before… then I wouldn’t have learnt nuthin (:

According to my camera this shot was taken at 9:05. Thanks for spending some of your’ Friday night with me guys. I think I got out of there around 9:30-9:45 (they close at 7)
Back in the garage:

Mounting the front… not much to say here, just tighten the front nut first then the back (don’t forget the threadlock, this is exactly the kind of nut that will back out under vibration, and it’s about the last one you want to loose at speed)

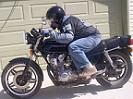
my bike can wheelie… as long as you remove the rear.
I didn’t take many shots of the assembly because during it I was either excited or pissed off (and neither mood makes time for pictures) but all in all it went together pretty smoothly. For a while I thought I had lost the retainer clip for the chain and the adjuster bolts, but a second trip back to the shop in the middle of the night located them sitting next to my desk in a long forgotten solvent bath. At 2:07 I had her running again, although no headlight wiring forced me to put off a ride till the next morning.
Ahh, a beautiful Saturday morning for riding. Note how much lighter the bike looks without the battery and how much room it frees up for some foam canisters.


Also you can see the brand new, still white wrap, that wont last long.
First stop of the day, back to high 5 to show her off a bit and see if Scott and D can squeeze her in for a bit of a tune up.

Every time I stopped for the first 15 minutes of my ride all the smoke coming off the wrap makes breathing a bit of a chore. The horrified looks that all the cagers give you as they stand off waiting for your’ bike to burst into flames make it all worth it though… makes me wish they’d smoke like that a bit longer.

You can see here that they’re getting a bit more seasoned towards the head.
No dice on the tune, so I head a little farther south and hit Greenville to chat a bit at SouthWest Choppers, and ask if they might be able to find the time for a little carb magic.


Again no dice but I do get to learn about what sounds like a badass bar for café racers (Later that evening when trying to get out to that bar is when I found out that my headlight doesn’t gel with the bat-pac)