Well, I painted the tailpiece in black primer, stuck it on the bike for a look...AND HATED IT! It really looked nice by itself, but lost something in the transition from wire to product. Didn't care for it at all, so I just stopped. I thjought the problem was the pink color, but it turned out to be too busy for the bike, even in black. I'm keeping the ducktail for the next step...
So, I'm waiting for my new fiberglass seat pan to cure, as we speak. A better tailpiece/seat will be born out of this experience, and I'lll just store my seat in a safe place for two up occasions. And my bike gets a diet instead of 8 extra pounds! I'll post some pics soon.
Out with the old, then out with the new, then...picsupdate
-
ronboskz650sr
- Legendary 750

- Posts: 995
- Joined: Thu Sep 02, 2004 2:36 pm
- Sex: Male
- Location: Sedalia, Mo
Out with the old, then out with the new, then...picsupdate
Last edited by ronboskz650sr on Sat Aug 27, 2005 4:50 am, edited 1 time in total.
Ride safe...God bless!
-Ron
[img]http://img.photobucket.com/albums/v398/ronboskz650sr/avatartotal.jpg[/img][img]http://img.photobucket.com/albums/v398/ronboskz650sr/wholebikeavatar2.jpg[/img]
-Ron
[img]http://img.photobucket.com/albums/v398/ronboskz650sr/avatartotal.jpg[/img][img]http://img.photobucket.com/albums/v398/ronboskz650sr/wholebikeavatar2.jpg[/img]


-
ronboskz650sr
- Legendary 750
- Posts: 995
- Joined: Thu Sep 02, 2004 2:36 pm
- Sex: Male
- Location: Sedalia, Mo
Thanks, I needed that. My internet connection has been on and off all night, and I'm tired (that fiberglass is thick stuff to mix up..tired fingers).
Ride safe...God bless!
-Ron
[img]http://img.photobucket.com/albums/v398/ronboskz650sr/avatartotal.jpg[/img][img]http://img.photobucket.com/albums/v398/ronboskz650sr/wholebikeavatar2.jpg[/img]
-Ron
[img]http://img.photobucket.com/albums/v398/ronboskz650sr/avatartotal.jpg[/img][img]http://img.photobucket.com/albums/v398/ronboskz650sr/wholebikeavatar2.jpg[/img]


-
ronboskz650sr
- Legendary 750
- Posts: 995
- Joined: Thu Sep 02, 2004 2:36 pm
- Sex: Male
- Location: Sedalia, Mo
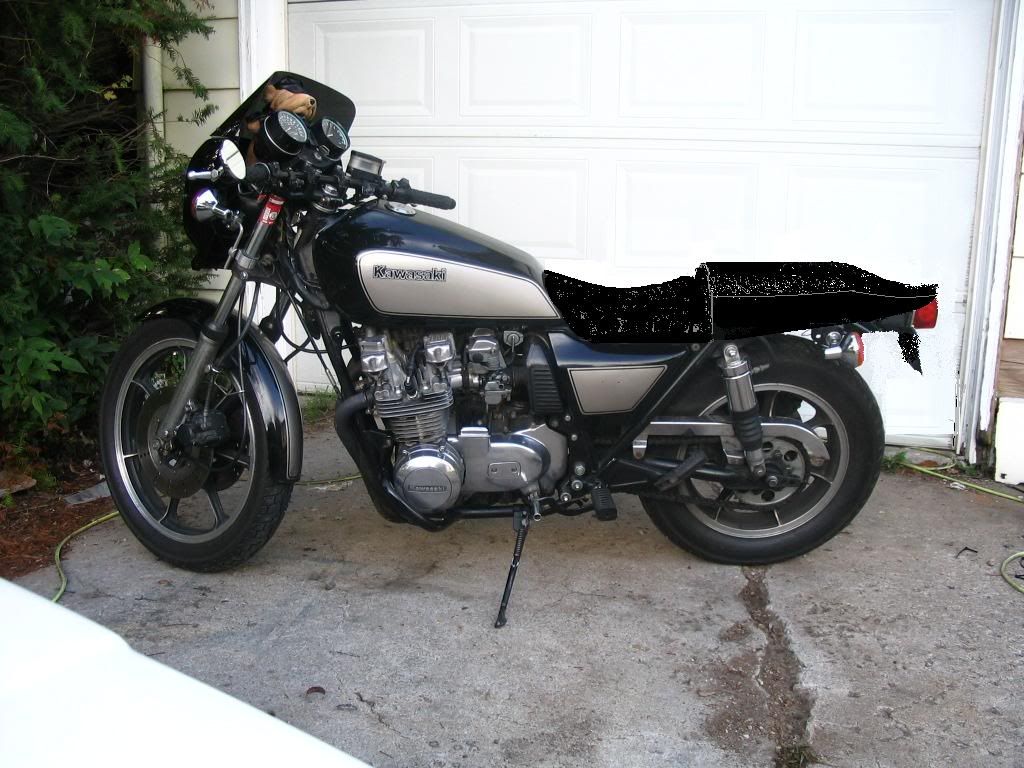
I believe they are from a 750 or 1000 cc variant from the 80's. They were on there when I got the bike. One of the guys on KZrider saw them, and sent me pressure info. He had pics of a couple bikes with them, but I can't remember what they were. They have a 70 psi maximum, though  ! I run them at 18 psi , and 28 when two-up. That makes them firm, but not skippy. I run 20 weight fork oil, too.
Ride safe...God bless!
-Ron
[img]http://img.photobucket.com/albums/v398/ronboskz650sr/avatartotal.jpg[/img][img]http://img.photobucket.com/albums/v398/ronboskz650sr/wholebikeavatar2.jpg[/img]
-Ron
[img]http://img.photobucket.com/albums/v398/ronboskz650sr/avatartotal.jpg[/img][img]http://img.photobucket.com/albums/v398/ronboskz650sr/wholebikeavatar2.jpg[/img]
-
ronboskz650sr
- Legendary 750
- Posts: 995
- Joined: Thu Sep 02, 2004 2:36 pm
- Sex: Male
- Location: Sedalia, Mo
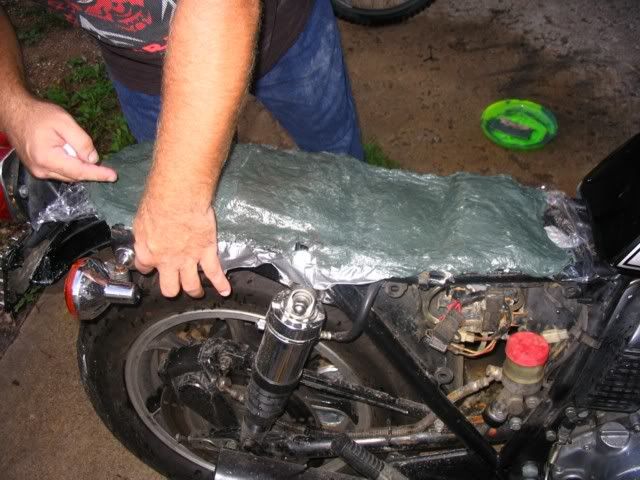
Here's a pic after the first layer of chopped glass...also extra layer in spots that flexed when I took it off to check it...
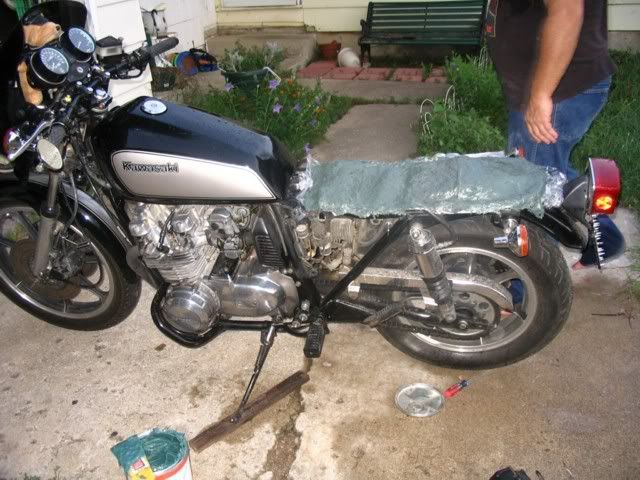
Here's one after a layer of matting and resin...I'll use one more with brackets sandwiched in, then reinforce the bracket areas with strips and resin...really strong already, one more layer will make it plenty strong to support the tailpiece, especially since it sits right on the frame...
Feeling more upbeat today, Thanks BuzZz, and Tech for the encouraging words! Every kind word really helps when a project goes sideways.
Ride safe...God bless!
-Ron
[img]http://img.photobucket.com/albums/v398/ronboskz650sr/avatartotal.jpg[/img][img]http://img.photobucket.com/albums/v398/ronboskz650sr/wholebikeavatar2.jpg[/img]
-Ron
[img]http://img.photobucket.com/albums/v398/ronboskz650sr/avatartotal.jpg[/img][img]http://img.photobucket.com/albums/v398/ronboskz650sr/wholebikeavatar2.jpg[/img]
-
ronboskz650sr
- Legendary 750
- Posts: 995
- Joined: Thu Sep 02, 2004 2:36 pm
- Sex: Male
- Location: Sedalia, Mo
Artist's conception
Here's what's in my head for the finished project...the paint will be gloss black with siver racing stripe(wide with two narrow on each side)..excuse the bad art  ...
...
Ride safe...God bless!
-Ron
[img]http://img.photobucket.com/albums/v398/ronboskz650sr/avatartotal.jpg[/img][img]http://img.photobucket.com/albums/v398/ronboskz650sr/wholebikeavatar2.jpg[/img]
-Ron
[img]http://img.photobucket.com/albums/v398/ronboskz650sr/avatartotal.jpg[/img][img]http://img.photobucket.com/albums/v398/ronboskz650sr/wholebikeavatar2.jpg[/img]
-
ronboskz650sr
- Legendary 750
- Posts: 995
- Joined: Thu Sep 02, 2004 2:36 pm
- Sex: Male
- Location: Sedalia, Mo
with the rough pan completed, I molded hinges into the side, using the original pins to hold my fabricated hinges to the seat.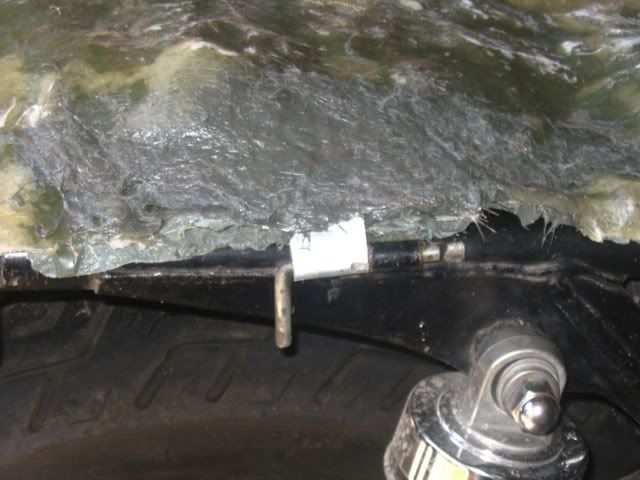
Then I bent a ubolt to use as the key latch...Heres the peephole I used to place the bolt into the latch from above, with the seat closed...
here's me glasing it in..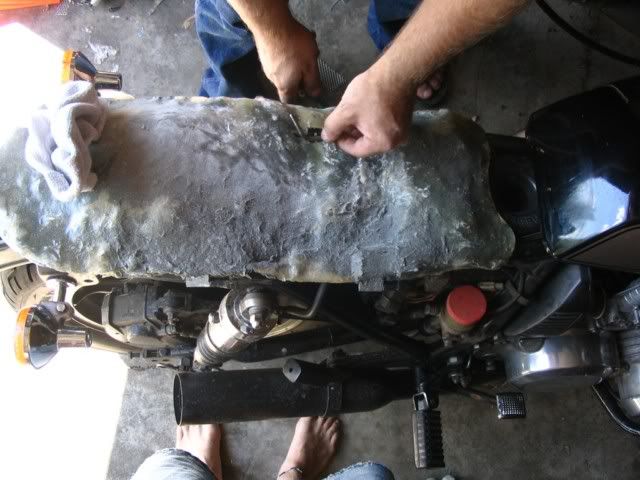
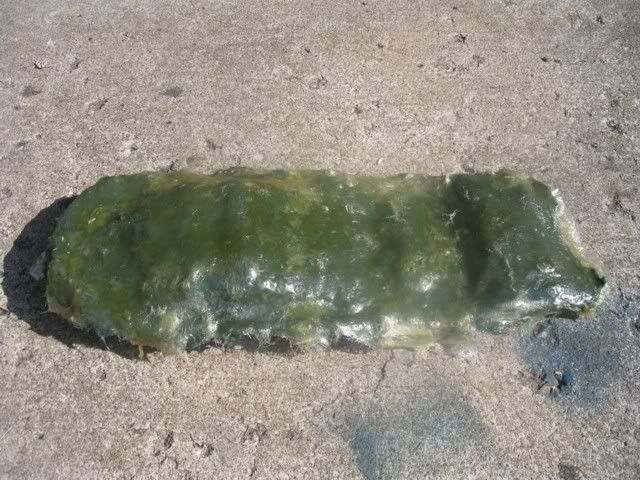
after that, the final double layer of glass mat and resin...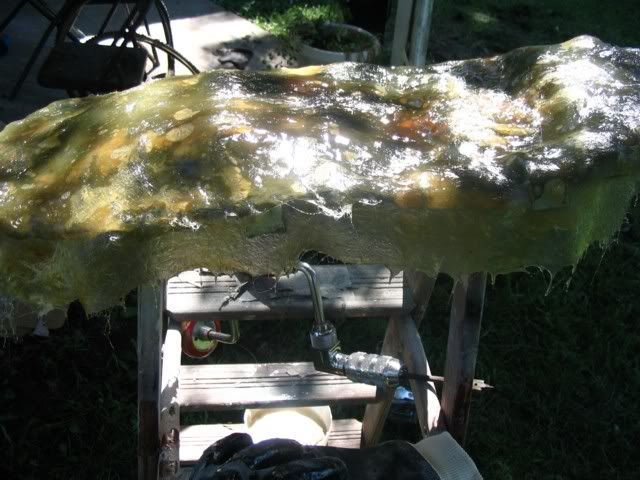
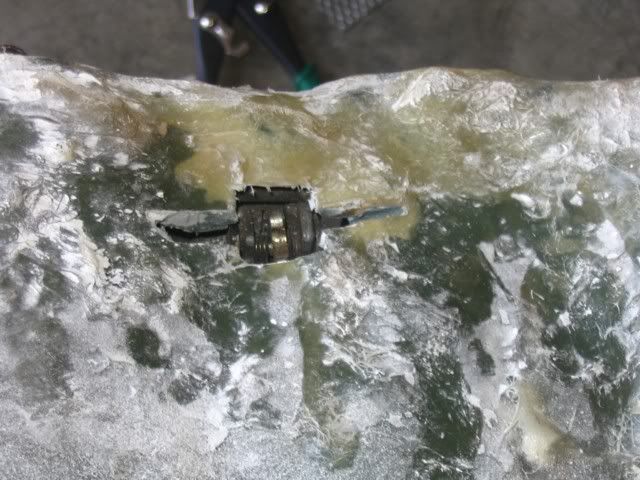
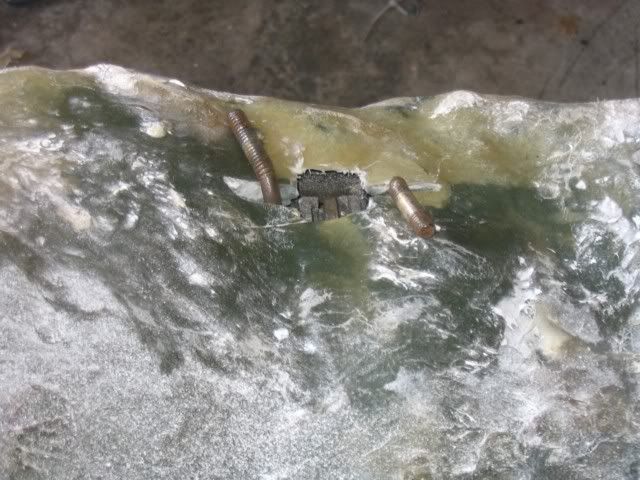
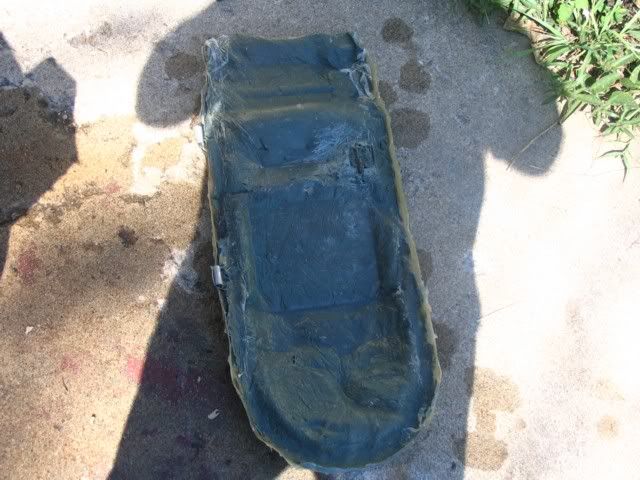
Here's a detail of the hardware and the bottom of the finished pan...
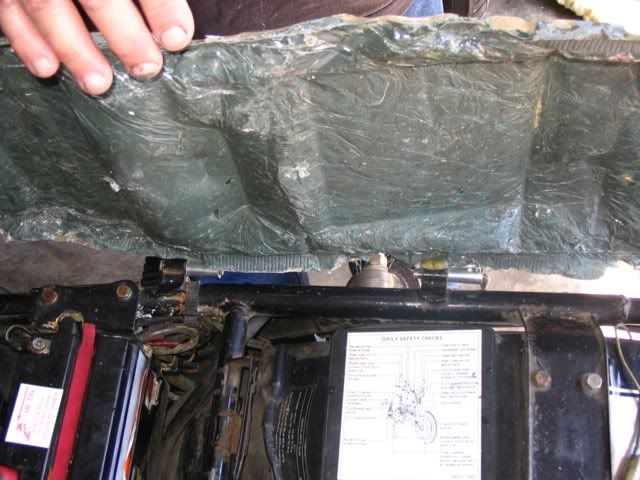
Here's the bike patiently waiting the next fit-up..

Works great...better than original, actually
Got alot done today, gotta go ride...
Then I bent a ubolt to use as the key latch...Heres the peephole I used to place the bolt into the latch from above, with the seat closed...
here's me glasing it in..
after that, the final double layer of glass mat and resin...
Here's a detail of the hardware and the bottom of the finished pan...
Here's the bike patiently waiting the next fit-up..
Works great...better than original, actually
Got alot done today, gotta go ride...
Ride safe...God bless!
-Ron
[img]http://img.photobucket.com/albums/v398/ronboskz650sr/avatartotal.jpg[/img][img]http://img.photobucket.com/albums/v398/ronboskz650sr/wholebikeavatar2.jpg[/img]
-Ron
[img]http://img.photobucket.com/albums/v398/ronboskz650sr/avatartotal.jpg[/img][img]http://img.photobucket.com/albums/v398/ronboskz650sr/wholebikeavatar2.jpg[/img]