Out with the old, then out with the new, then...picsupdate

-
ronboskz650sr

- Legendary 750

- Posts: 995
- Joined: Thu Sep 02, 2004 2:36 pm
- Sex: Male
- Location: Sedalia, Mo
Seat construction
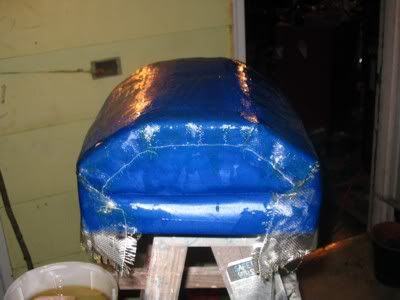
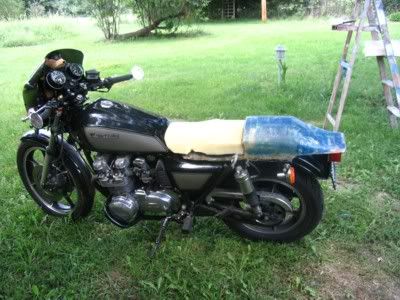
Today I started the seat. Five 1/2 inch layers of Polyolefin foam. It's waterproof, and dense, so I used it for a base.
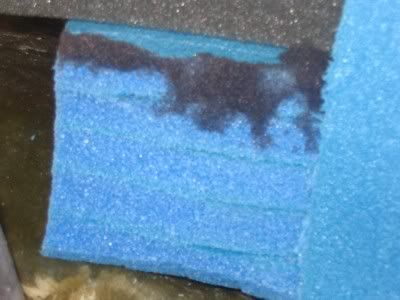
It's otherwise known as camper's mat at walmart for $6. I alsoused a layer to cover the completed shape after all the carving with an electric turkey knife.
This shows the area hollowed out for the air intake..this mimics the stock seat in this area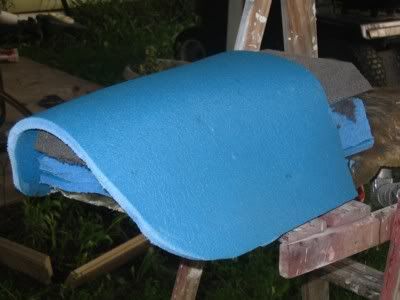

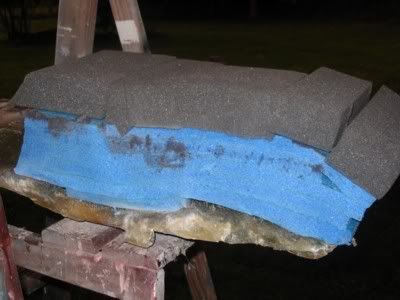
Everything is glued with spray contact cement. The grey foam is a medium density foam used for electronic equipment protection. Not the light eggcrate stuff, the dense blocky stuff. Everything is shaped to my exact liking, and will be covered with polyester batting, saran wrap, and vinyl, once I find the vinyl I want. The whole thing is much, much lighter than the stock seat, so far. Adding the tailpiece will change that. Although it looks bulky in the photo, the extra high density foam is necessary to bring the seat back to a height where I have some legroom. The seat pan is about 1 1/2 " lower than the stock one which sat on rubber blocks, vs right on the frame. The blue foam cover hasn't been trimmed yet, and adds to the illusion. The seat rides nice, and sits almost exactly as high as before, the polyester batting and vinyl should put it right where I want it.
It's otherwise known as camper's mat at walmart for $6. I alsoused a layer to cover the completed shape after all the carving with an electric turkey knife.
This shows the area hollowed out for the air intake..this mimics the stock seat in this area
Everything is glued with spray contact cement. The grey foam is a medium density foam used for electronic equipment protection. Not the light eggcrate stuff, the dense blocky stuff. Everything is shaped to my exact liking, and will be covered with polyester batting, saran wrap, and vinyl, once I find the vinyl I want. The whole thing is much, much lighter than the stock seat, so far. Adding the tailpiece will change that. Although it looks bulky in the photo, the extra high density foam is necessary to bring the seat back to a height where I have some legroom. The seat pan is about 1 1/2 " lower than the stock one which sat on rubber blocks, vs right on the frame. The blue foam cover hasn't been trimmed yet, and adds to the illusion. The seat rides nice, and sits almost exactly as high as before, the polyester batting and vinyl should put it right where I want it.
Ride safe...God bless!
-Ron
[img]http://img.photobucket.com/albums/v398/ronboskz650sr/avatartotal.jpg[/img][img]http://img.photobucket.com/albums/v398/ronboskz650sr/wholebikeavatar2.jpg[/img]
-Ron
[img]http://img.photobucket.com/albums/v398/ronboskz650sr/avatartotal.jpg[/img][img]http://img.photobucket.com/albums/v398/ronboskz650sr/wholebikeavatar2.jpg[/img]

-
ronboskz650sr
- Legendary 750
- Posts: 995
- Joined: Thu Sep 02, 2004 2:36 pm
- Sex: Male
- Location: Sedalia, Mo
Thanks, Joe. Today I went to Lowe's for some 2" styrofoam insulation. I asked if it came any smaller than 4'x8' sheets. It didn't, but the guy I was talking to just built a boat dock and had some 12"x4'x4' foam "scraps" he has been wondering what to do with! He said stop by tomorrow and he'll have one for me in the truck! He said he's sick of looking at the stuff. Awesome. I will use it to carve my tailpiece right on the bike, then remove the seat pan and lay up the fiberglass over the foam. The foam will be covered with saran wrap prior to glassing. The foam is melted out with acetone afterwards, and I'll have a storage space in the tail. I'll probably access it from the front via a false back pad on the seat. Another option is from underneath, making it lockable, waterproof storage space. Just enough for a bible and a mountain dew!

Ride safe...God bless!
-Ron
[img]http://img.photobucket.com/albums/v398/ronboskz650sr/avatartotal.jpg[/img][img]http://img.photobucket.com/albums/v398/ronboskz650sr/wholebikeavatar2.jpg[/img]
-Ron
[img]http://img.photobucket.com/albums/v398/ronboskz650sr/avatartotal.jpg[/img][img]http://img.photobucket.com/albums/v398/ronboskz650sr/wholebikeavatar2.jpg[/img]


-
ronboskz650sr
- Legendary 750
- Posts: 995
- Joined: Thu Sep 02, 2004 2:36 pm
- Sex: Male
- Location: Sedalia, Mo
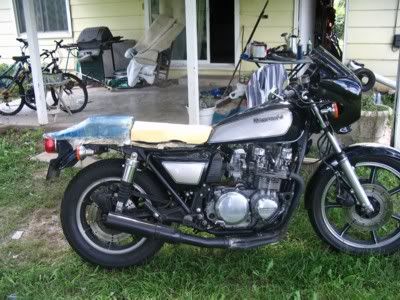
It sits great, and I took it for a short spin through the yard to feel some bumps, then down the street. It rides nice...only a long ride will tell for sure, so I'll probably put a temp cover on it for a little while. As for learning fiberglass...self taught, and no expert... but I am learning more from this project than Bondo ever taught me. I do think you need power tools to really get it done in fiberglass. Same for bondo, but it is at least workable with hand tools. The glass is very difficult to work without power. I prefer air tools for sanding and grinding anything, anyway, including seat foam...just my .02. I do have some art schooling (not like chris, but some), and that has come in very handy over the years with automotive and motorcycle projects. Next step is carving the tailpiece out of styrofoam. I'll glue a block of it right to the pan and carve it right on the bike. The seat foam is off until that's done...I just don't have the styrofoam yet...later today. I've found some black vinyl, so that will be ready to go when the time comes. I'll just glue an old black t-shirt to the pan, stretched over the foam for testing purposes.
Oh, and I am from New York...Was that your guess (I bet not ) ?
) ?
Oh, and I am from New York...Was that your guess (I bet not
Ride safe...God bless!
-Ron
[img]http://img.photobucket.com/albums/v398/ronboskz650sr/avatartotal.jpg[/img][img]http://img.photobucket.com/albums/v398/ronboskz650sr/wholebikeavatar2.jpg[/img]
-Ron
[img]http://img.photobucket.com/albums/v398/ronboskz650sr/avatartotal.jpg[/img][img]http://img.photobucket.com/albums/v398/ronboskz650sr/wholebikeavatar2.jpg[/img]
-
ronboskz650sr
- Legendary 750
- Posts: 995
- Joined: Thu Sep 02, 2004 2:36 pm
- Sex: Male
- Location: Sedalia, Mo
Couldn't hook up with the foam guy today, so I glued some cheap urethane foam and carved a mockup that's curing as I write this. It's one layer of glass cloth, and I'm experimenting with a more subtle set of lines, while still mimicking the gas tank..
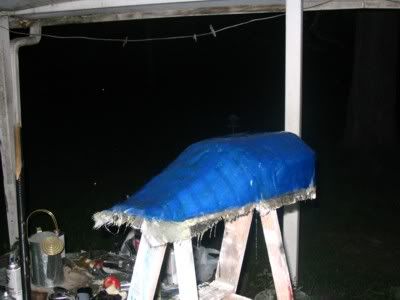
I'm so impatient...tomorrow I'm going to try and get the dock foam for future use, or to experiment with other variations of this. Meanwhile...slowly but surely it progresses.
I'm so impatient...tomorrow I'm going to try and get the dock foam for future use, or to experiment with other variations of this. Meanwhile...slowly but surely it progresses.
Ride safe...God bless!
-Ron
[img]http://img.photobucket.com/albums/v398/ronboskz650sr/avatartotal.jpg[/img][img]http://img.photobucket.com/albums/v398/ronboskz650sr/wholebikeavatar2.jpg[/img]
-Ron
[img]http://img.photobucket.com/albums/v398/ronboskz650sr/avatartotal.jpg[/img][img]http://img.photobucket.com/albums/v398/ronboskz650sr/wholebikeavatar2.jpg[/img]
-
ronboskz650sr
- Legendary 750
- Posts: 995
- Joined: Thu Sep 02, 2004 2:36 pm
- Sex: Male
- Location: Sedalia, Mo
Here's the latest version...This tailpiece is being secured to the pan and curing as I write this. The seat is carved, and very comfortable with the 1'2 polyolefin cover. The vinyl is waiting, too. After I get the tail fully glassed into the pan, I'll concentrate on finishing off that whole assembly, including paint. After that, I'll use Goop Marine contact cement to attach the foam, staple the vinyl, stretch it and staple the other side, and it will be done. I'll post a few more pics along the way, of course.
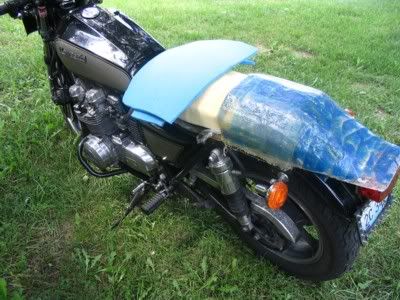
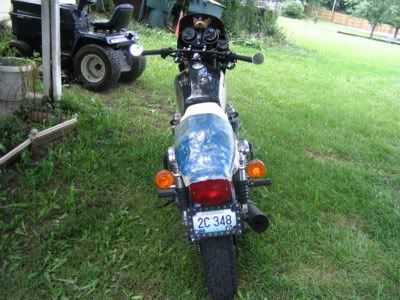
Before anyone asks, the cutout in the side of the seat is to level the foam on the pan where the battery causes the pan to rise. This gives me more surface area for gluing, and a level piece of foam for the carving.
Before anyone asks, the cutout in the side of the seat is to level the foam on the pan where the battery causes the pan to rise. This gives me more surface area for gluing, and a level piece of foam for the carving.
Ride safe...God bless!
-Ron
[img]http://img.photobucket.com/albums/v398/ronboskz650sr/avatartotal.jpg[/img][img]http://img.photobucket.com/albums/v398/ronboskz650sr/wholebikeavatar2.jpg[/img]
-Ron
[img]http://img.photobucket.com/albums/v398/ronboskz650sr/avatartotal.jpg[/img][img]http://img.photobucket.com/albums/v398/ronboskz650sr/wholebikeavatar2.jpg[/img]