the build(s?) (mysta2)
-
logitech104

- Legendary 500

- Posts: 606
- Joined: Mon Jul 03, 2006 7:57 pm
- Sex: Male
- Location: Washington State
-
snorkelfork
- Rookie

- Posts: 5
- Joined: Fri Mar 02, 2007 9:49 am
i have a few questions about your bike...
is that a cb360 or a cj360t frame? and what clearcoat did you use on your tank?
i have been riding a 70' cl350 for about a year and have been thinking about doing the same thing to an old set of high pipes i have.
after looking at your blog i really fell for the 360 frame style with the two downbars on the outside rather than the 350's center tube. with the 350 even after you clear out the area in front of the rear wheel you have have this huge box tube to look at.
a friend just gave me a cj360t basketcase and i am planning to install my 350 engine in this frame but first i am going to have to modify some of the bracketing to make it work.
great job by the way.
-
logitech104
- Legendary 500
- Posts: 606
- Joined: Mon Jul 03, 2006 7:57 pm
- Sex: Male
- Location: Washington State

-
mysta2
- Legendary 300

- Posts: 361
- Joined: Wed Mar 02, 2005 4:23 pm
- Sex: Male
- Location: Little Elm, TX.
back at the top :)
It's been cold here, and when it gets cold, my bikes tend to fall apart: this is an account of the latest incident:
There's of course nothing particularly wrong with the original monster bars.

.but sometimes you just wonder what it will look like with something different. and I bet it would look cool with some of my clubmans.
There tuned out to be a few problems with this idea though, first, the grip length wouldn't fit the original controls so I had to put some pretty good notches in brackets:


.not big enough

.better
Then the headlight was fighting with the brake cables for the same space, calling for some new brackets:
I had to make a template from the original pair, scan them into Illustrator and move the headlight mount holes 2 inches down and an inch out. Found some aluminum, and cut:


. these are my junk pair, I used a piece of stock that was already partially cut for another part and abandoned, that's why they have lines through them already. They weren't supposed to be a junk pair. but in the next couple of steps I screw them up pretty good
Mark where the bends need to be using the original template:

And place them in the break, it's good to do both at the same time to be sure they'll match

Check your' angle till they match the originals

Then the second bend. Note that these two bends return on eachother. so very wrong, this is that screwing up part I mentioned before.

So on the left is the second pair I had to make up, in the middle are Ducatis' originals, and on the right is one of the messed up ones.

The last hurtle to overcome was that massively gross gauge pod that all monsters are stricken with. Now that the bars are going to sit lower the pod is even more unacceptable than it was before. I tried to figure out how to go completely without it but I didn't want to loose the odometer or temp readout, so I'll just have to make a new pod.
This is what's the giant thing is packaging:

Size it is vs. size it needs to be

First step: scan for reference


Throw on some splines in Illustrator

Splines will give you the shape to start with but the most important part is to make sure to get some really tight measurements


Since I'm trying to take all the airspace out of the pod my measurements become very important, I want just enough room for the components without any extra.
My ProE part:

and surfcam

This is what $30.00 worth of plastic looks like

A little bit about machining two sided parts on a 3 axis machine:
The first side’s pretty self-explanatory: stick it to the table, flycut it to height, and run your’ program. After cutting the volume fill it with hot wax and wait for it to cool:

flycut it back to height:


and flip it using the 3/16 holes drilled in the part and table


and we have part:


first test fit, no gasket, loosely fit together… and very waxy

hmm… headlight may have to come up a bit

after a bath in some heptane to dissolve any remaining wax

it’s ready for final fit


I guess I got used to the headlight where it was, it may change in the future, but right now I’m not in too much of a hurry.
BTW. This:

Is why I like vintage bikes
There's of course nothing particularly wrong with the original monster bars.
.but sometimes you just wonder what it will look like with something different. and I bet it would look cool with some of my clubmans.
There tuned out to be a few problems with this idea though, first, the grip length wouldn't fit the original controls so I had to put some pretty good notches in brackets:
.not big enough
.better
Then the headlight was fighting with the brake cables for the same space, calling for some new brackets:
I had to make a template from the original pair, scan them into Illustrator and move the headlight mount holes 2 inches down and an inch out. Found some aluminum, and cut:
. these are my junk pair, I used a piece of stock that was already partially cut for another part and abandoned, that's why they have lines through them already. They weren't supposed to be a junk pair. but in the next couple of steps I screw them up pretty good
Mark where the bends need to be using the original template:
And place them in the break, it's good to do both at the same time to be sure they'll match
Check your' angle till they match the originals
Then the second bend. Note that these two bends return on eachother. so very wrong, this is that screwing up part I mentioned before.
So on the left is the second pair I had to make up, in the middle are Ducatis' originals, and on the right is one of the messed up ones.
The last hurtle to overcome was that massively gross gauge pod that all monsters are stricken with. Now that the bars are going to sit lower the pod is even more unacceptable than it was before. I tried to figure out how to go completely without it but I didn't want to loose the odometer or temp readout, so I'll just have to make a new pod.
This is what's the giant thing is packaging:
Size it is vs. size it needs to be
First step: scan for reference
Throw on some splines in Illustrator
Splines will give you the shape to start with but the most important part is to make sure to get some really tight measurements
Since I'm trying to take all the airspace out of the pod my measurements become very important, I want just enough room for the components without any extra.
My ProE part:
and surfcam
This is what $30.00 worth of plastic looks like
A little bit about machining two sided parts on a 3 axis machine:
The first side’s pretty self-explanatory: stick it to the table, flycut it to height, and run your’ program. After cutting the volume fill it with hot wax and wait for it to cool:
flycut it back to height:
and flip it using the 3/16 holes drilled in the part and table
and we have part:
first test fit, no gasket, loosely fit together… and very waxy
hmm… headlight may have to come up a bit
after a bath in some heptane to dissolve any remaining wax
it’s ready for final fit
I guess I got used to the headlight where it was, it may change in the future, but right now I’m not in too much of a hurry.
BTW. This:
Is why I like vintage bikes
-
mysta2
- Legendary 300
- Posts: 361
- Joined: Wed Mar 02, 2005 4:23 pm
- Sex: Male
- Location: Little Elm, TX.
hey snorkle, I appreciate your interest but apparently you haven't been paying much attention. Both LoudBike and 69 are CL 360s. The clear that I used on LoudBikes' tank was a DBU 2002 (same as on the frame and everyting else) and it didn't work worth a damn fuel turned it yellow and the first time I brushed an air gun past it all of it blew off.
thanks
thanks
[url=http://www.cafepress.com/dropbars][img]http://www.dropbars.com/cafepress%20banner.jpg[/img][/url]
Check out my [url=http://www.totalmotorcycle.com/BBS/viewtopic.php?t=5844]blog[/url] for the latest on my little project.
Check out my [url=http://www.totalmotorcycle.com/BBS/viewtopic.php?t=5844]blog[/url] for the latest on my little project.
-
snorkelfork
- Rookie
- Posts: 5
- Joined: Fri Mar 02, 2007 9:49 am
yep, that's how those finishes usually to go. i was hoping you had found a magic bullet. with respect, i rechecked this thread because i hate making redundant questions and i think you'll find that this is the first time you got specific in regards to the model. looking forward to seeing how things turn out. cheers...
-
blues2cruise
- Moderator

- Posts: 10184
- Joined: Fri Apr 22, 2005 4:28 pm
- Sex: Female
- Years Riding: 16
- My Motorcycle: 2017 Africa Twin 1000cc
- Location: Vancouver, British Columbia
-
mysta2
- Legendary 300
- Posts: 361
- Joined: Wed Mar 02, 2005 4:23 pm
- Sex: Male
- Location: Little Elm, TX.
Me too, well this is my excuse. My girlfriend and I just bought a house and all of my money has been going to Lowes and closing costs and all that nonsense, not to mention my time.
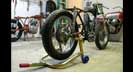
But that's not to say that I've forgotten about my bikes, a big motivator for the purchase of this house (or, a house in general) is the large, relatively large, garage which I have all kinds of plans for. Something like this:

a project that will have to come some distance before much major work can resume on the bikes.
Another one of my projects that is entirely new territory to me is my much talked about website that if anyone's clicked through to they have surely been sorely dissapointed so far.
Consider this a little preview of the direction I'm working on taking it:


If anyone can figure out why that top pic isnt working please let me know... or if an administrator could fix it I'd appreciate it
But that's not to say that I've forgotten about my bikes, a big motivator for the purchase of this house (or, a house in general) is the large, relatively large, garage which I have all kinds of plans for. Something like this:
a project that will have to come some distance before much major work can resume on the bikes.
Another one of my projects that is entirely new territory to me is my much talked about website that if anyone's clicked through to they have surely been sorely dissapointed so far.
Consider this a little preview of the direction I'm working on taking it:
If anyone can figure out why that top pic isnt working please let me know... or if an administrator could fix it I'd appreciate it
Last edited by mysta2 on Wed May 09, 2007 4:12 pm, edited 1 time in total.
-
mysta2
- Legendary 300
- Posts: 361
- Joined: Wed Mar 02, 2005 4:23 pm
- Sex: Male
- Location: Little Elm, TX.
Oh, I just read the text on that 550 page I made, and reading it out of context like that would probably lead you to believe that the car in the picture is mine, It's not. That's a picture I took while visiting the Beck shop. My "car" is not nearly that complete, infact all that I have of that project is a pair of coils and spindles... and I think I have the wrong spindles.
You can read all about my "car" right here if you'd like though.
You can read all about my "car" right here if you'd like though.
-
blues2cruise
- Moderator
- Posts: 10184
- Joined: Fri Apr 22, 2005 4:28 pm
- Sex: Female
- Years Riding: 16
- My Motorcycle: 2017 Africa Twin 1000cc
- Location: Vancouver, British Columbia