Page 4 of 6

Posted: Mon May 29, 2006 8:48 pm
by Mintbread
Things have been typically hectic at the moment with the arrival home of my wife and Riley from the hospital. Luckily I was able to get a couple of weeks off work so I am able to live with the sleep deprivation.

Not working has also meant that I have been able to tinker with the bike during his downtimes and today I managed to synch my carbs which is something I have wanted to do since the rejet.
I have a mate at work that has promised to bring in his digital carb synch tool several times but has failed to come through so I chose to make a simple one at home as opposed to forking out big bucks to buy one.
In the end it cost me a total of $6.50 to make and although the results are not as precise as that of the professional ones, but considering how out of whack the carbs were I am lightyears ahead of where I started.

Image

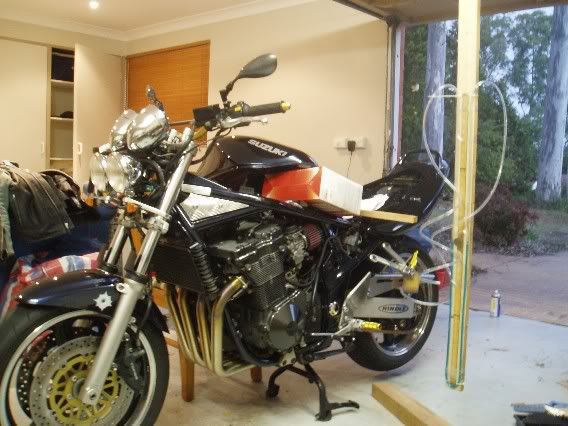
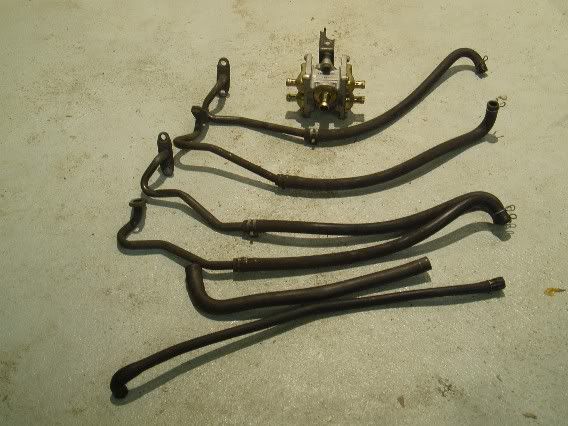
A couple of metres of clear tube, four connectors and some sticky tape was all it took to knock this up. The hardest part was getting the hoses onto the carbs which is why I cut some shorter pieces which I left on the carbs and just used the connectors to fit them to the "guage" as I needed them.
Once connected to two carbs at a time it is easy to balance them as you simply watch the fluid in the tube and adjust the carb synch screw until the fluid is balanced.
I am yet to take it out for a test ride but I am sure it is going to be a big improvement over how it was.

Posted: Thu Jun 01, 2006 9:05 pm
by Mintbread
How wrong I was!
I took the bike out for a ride to see how well the synch was and the bike went like an absolute pile o' dodo. It was missing constantly, way down on power and backfiring all over the place.
Back to the drawing board it seems.
I get home and tear the bike down again to do another carb synch to see if I had done something horrendously wrong the first time, but before I do I thought I would give the plugs a going over. 1 and 2 were fine but 3 and 4 were covered in carbon. As I was cleaning them up I was wondering how I could be running rich on two cylinders only. I reinstalled the plugs, redid the carb synch and put things back together. Started up fine and ran like a champ. I have absolutely no idea what I did wrong the first time but I just can't argue with success.

Since I rejetted and went to pod filters I naturally had to remove the airbox which created a few minor problems such as the crankcase breather hose had nowhere to go and neither did a breather hose for the stupid P.A.I.R. system that is designed to make sure no unburnt fuel exits the exhaust. This breather hose now made a hell of a racket without the sound damping effects of the airbox so I decided the whole damned system had to go.

This is what it comprised of:

Image

All it seemed to do was create a lot of hoses that got in my way. The good thing was that I simply had to pull the system out and fab up 4 cover plates for where it was bolted to the exhaust ports and install them. With the P.A.I.R. system and the airbox gone I have oodles of room to play with.

This is what it now looks like:

Image

I wanted to put the crankcase breather hose and filter somewhere more visible but in the end thought it best to put it out of the way of bad weather.

Posted: Sat Jun 03, 2006 12:25 am
by Mintbread
The last couple of days have been quite productive for me regarding the bike. Staying close to home has given me some great opportunities to get some work done and the weather being colder means I have no problems sitting in the garage with my bike in pieces as opposed to being out for a ride.
Since I got the bike I have not been super happy with the handling but knowing that it was a constant work in progress has meant that I will sort it out sooner or later. Therefore the rear shock was the first to go. With only preload and rebound adjustment I had a hard time setting it up the way I liked it added to the fact that the shock is too soft gave me a perfect reason to upgrade.
I decided to go with a Hayabusa shock because they are available fairly cheaply through motorcycle wreckers have preload, rebound and compression adjustments that will make it easier to dial in perfectly, are rebuildable and lastly it bolts straight on to the Bandit with zero modification required.

Stock shock:
Image

Busa shock:
Image

The Busa shock is only 10mm longer than the Bandit shock but it gives the tail around a 30mm lift which means slightly quicker steering and a little more weight on the front.

Image

Now I just need to convince my wife how badly I need that GSX-R front end...

Posted: Sat Jun 03, 2006 3:06 pm
by camthepyro
God I love your bike... I need one, I have to have one...

Posted: Sat Jun 03, 2006 6:23 pm
by Mintbread
Haha, I must admit that I love it too. I would have no problem recommending one either as the power is beautifully predictable from low down and it only goes as fast as you want it to without any surprises.

Added to the fact that the back end handles like a dream, I could not be happier. The ride height is a little better now that the tail has come up a bit and it has done wonders for the steering, not to mention showing off more of the back tyre...

Image

Image

As soon as I get a few bugs ironed out in the carbs, I may just have a rest from working on it and actually ride it.

Posted: Tue Jun 06, 2006 4:46 pm
by Scoutmedic
Looks sweet! Nice job!

Posted: Sun Jun 11, 2006 6:23 pm
by Mintbread
Well the minor changes keep on coming. I decided that I did not like the stock pillion seat and grabrail, so they had to go. As seen in pictures above there is a large bump at the back of the pillion seat that sits up above the tail of the bike which makes it look a little porky, so I thought I should just chop it off.
The grabrail is remarkably heavy for a small piece of equipment which means I am not sad to see it go:

Image

I am not exactly the most experienced upholsterer but I have never let a complete lack of knowledge stop me from doing something before so I jumped right in.

Image
Image

Once I started cutting I had a few second thoughts and as usual my wife thought I was insane to cut up a perfectly good seat but it was all unfounded, of course...
It didn't take much to get the shape I wanted and putting the cover back on was a snap. I pulled out the trusty stapler and stretched and stapled as I went. Piece of cake.

Next I had to fab up a couple of covers to fill the space in the tail that the grabrail had left and since I have used it elsewhere on the bike, aluminium chequer plate was the material of choice.

Image

I considered keeping it silver but it stuck out like dogs balls and decided to paint it instead. Knowing for a fact that I would never be able to match the colour to that of the bike, black was the way to go.

Image

Once fitted in place I gave the bike a quick wash and stood back to admire my handiwork. It has really tidied up the tail and made it look a lot less bulky.

Image

Image

Image

Posted: Sat Jun 24, 2006 2:58 pm
by Mintbread
Well, yesterday was an absolutely cracking day for a ride. We had organised to meet a a cafe on a local bike road and all I knew was that several guys from my delivery centre were going as were a couple others from a neighbouring d/c. Upon arrival I discovered that we would be riding with a group from northriders so all up there were about 40 bikes!

It had rained the night before so the roads were a little damp first thing but the sun was out an it promised to be a good day weather-wise. We had a little meeting about the ride and various other safety related issues and we were off. I thought with a group this size that the pace would be somewhat sedate but not far into the ride I realised it would be similar to our smaller group rides of five or six that it was flat out.

I was right up the front of the group and my regular riding mates were a little further back. I was hooking along nicely and then things just started to feel wrong. The bike was not holding a line and it started to feel a little heavy around corners. At first I thought it could have been the wet road or a million other little things but as it got progressively worse I decided to pull over and investigate.

Damn.
Image
Image

Air was pouring out of the tyre and I knew my participation in the ride was over. I gave the thumbs down as one of my mates went past and he pulled up to see if he could help. It was a fairly big cut so we knew patching it was not going to help so he went to catch up with the group as I organised a salvage. We have various bike recovery companies and I wanted to find out how much they charged but when he quoted "about $250" I reconsidered my options!

My ever suffering wife was called into action and several hours (and about a million bikes riding past having fun) later she and her father showed up with a bike trailer in tow (total cost $49). Tied the bike down and made the miserable drive home lamenting on what sort of ride I was missing.
A mate rang me later in the evening to make sure things went OK only to tell me about a fairly average ride day. He said that the group was too big and that every stop turned into a major drama. He also said that once he left me to catch the group that about 15 KM's away from me a young fella had thrown his ZZR250 into a guard rail so he stopped to lend assistance there and put the poor kids bike back into a reasonable condition so that he could limp it home as he had only sustained "a bit of a sore knee" but was right to ride.

Later in the ride a bloke that occasionally rides with us went into a corner a little hot and dumped it on the side of the road. He was fine but his GS500 suffered some scratches on engine covers etc. All in all things sounded a little reckless and I am somewhat glad that I missed most of the drama.

I will get a new tyre put on tomorrow that I had thankfully decided to replace this week anyway. It was down past the wear indicators so I saw this ride as a chance to thrash the tyre one last time and then replace it.
Oh well, it could have been worse...

Posted: Sun Jun 25, 2006 9:03 pm
by Mintbread
Well it turns out my puncture was caused by a nice sharp piece of blue metal road base:
Image

How I managed to get that imbedded in my tyre and to have it work its way in in such a short space of time I will never know. Talking to the tyre guy about strange things he has found inside tyres he said that yesterday he retrieved a house key from a punctured tyre he changed. It boggles the mind...

So the new tyre is on and $290 later the bike is back on the road. I decided to go with the somewhat harder Pirelli Diablo as I only got a lazy 6,000 km's out of my Avon Viper plus with the added HP it wont hurt to have something that will last a little longer.

Mmm, new rubber:

Image

Image

Posted: Sat Sep 23, 2006 12:00 am
by Mintbread
Well, the evolution continues...

I have been doing a lot more riding with the current set-up of the bike and have come to the conclusion that I seem to be wanting to ride beyond the abilities of that of the front end. I have been getting a lot of sliding from the front when I push the bike through faster corners and decided some changes were needed. With a trackday looming also I thought now is as good a time as ever to make some changes.

Image

Enter new digital speedo/tach and a set of clip-ons.
This will add a lot of weight to the front and hopefully cure the handling issues that I am currently experiencing. The dash is something I have wanted to get since I started modding the bike and now is as good a time as any to fit it.

Image

Image

Spent all day rewiring the bike and have all but the speedo up and running. Tomorrow I shall take it for a spin regardless of whether I know how fast I am goingor not...