I've been thinking over the problem some more. Turns out Suzuki changed the carbs from 31mm bodies with a single fuel outlet petcock, in 1988 and 1989, to 33mm carbs with a dual outlet petcock. Seems there were some problems with fuel supply, just like I was having! So the question now comes down to how I can fix it. It appears not to be a problem of flow from the petcock to the carbs, but from the single carb the fuel line feeds into, which goes to a common fuel rail for all the carbs.
My current plan of attack is to try to find a T-hose to replace the fuel line connector between the two middle carbs. By running another fuel line from my on-the-way '90 Kat 750 (thus dual-outlet) petcock into this connector, I should be able to augment the fuel flow to keep the bowls full at all times. I might be able to snag that connector from the '90-'97 Katana carbs, it's about $3 for it, assuming it fits. Otherwise, I'll have to hit up auto parts stores and see what my options are.
Katana progress
-
Skier
- Site Supporter - Platinum

- Posts: 2242
- Joined: Sat Aug 07, 2004 10:44 am
- Sex: Male
- Location: Pullman, WA, USA
Well my chain and sprockets adventure didn't go too well. Turns out I have the rear wheel from a 1988 Katana, which was the first, and oddball, year. Which means my nice expensive chain and sprocket kit has the wrong rear sprocket on it, and won't fit.
If it ain't one thing, it's another! Guess my spring break trip plans are probably nixed, with both my motorcycle out of aciton.
Can't win 'em all...
Well, here are some pictures for your time:
Yum:

Getting ready for some fun-fun chain removal!

Wait, what the hell is that?

Oh, it's a master link clip. Great. Ah well:

Yeah, being rusted together and having to be pressed out with my kickass chain breaker is a Bad Thing:

GRRR FOUR BOLT HUB FROM AN '88 MAKING MY KIT FOR AN '89 USELESS:

If it ain't one thing, it's another!
Can't win 'em all...
Well, here are some pictures for your time:
Yum:
Getting ready for some fun-fun chain removal!
Wait, what the hell is that?
Oh, it's a master link clip. Great. Ah well:
Yeah, being rusted together and having to be pressed out with my kickass chain breaker is a Bad Thing:
GRRR FOUR BOLT HUB FROM AN '88 MAKING MY KIT FOR AN '89 USELESS:
[url=http://www.motoblag.com/blag/]Practicing the dark and forgotten art of using turn signals since '98.[/url]
-
Skier
- Site Supporter - Platinum
- Posts: 2242
- Joined: Sat Aug 07, 2004 10:44 am
- Sex: Male
- Location: Pullman, WA, USA
So I received my new petcock in the mail. I rushed to install it and find my old petcock poured gas everywhere as soon as the hose was removed from it. Strange. So I try blowing air into the fuel line, can't get anything in there at all. Strange, since the carb bowls are dry.
So I took the carbs off (I'm getting far too good at that ). I had previously set all the float heights to 9/16", right smack in the middle of the recommended settings. I then saw what the bowl fuel levels were REALLY at using the hose method and they were widly off. Carb one was really high, carb two was ok and carb three and four were rediciulously low. I set them using water in the fuel line so they were all in the ballpark.
I think this is the better way to set them, since the true fuel level doesn't give a squirt about the float height, only about if the needles and seats let fuel in or not. So now they are set to what should work, and I'm going to bolt them all together and make sure it all works... with my old petcock.
So I took the carbs off (I'm getting far too good at that
I think this is the better way to set them, since the true fuel level doesn't give a squirt about the float height, only about if the needles and seats let fuel in or not. So now they are set to what should work, and I'm going to bolt them all together and make sure it all works... with my old petcock.
[url=http://www.motoblag.com/blag/]Practicing the dark and forgotten art of using turn signals since '98.[/url]

-
Skier
- Site Supporter - Platinum
- Posts: 2242
- Joined: Sat Aug 07, 2004 10:44 am
- Sex: Male
- Location: Pullman, WA, USA
This looks a bit better:

Ta-da!

Yummy master link stuff:

Close...

Looks like a messy bike with a new chain and sprocket to me!

I have to re-sync my carbs since I messed with the idle mixtures via the float heights, but she starts up without a problem.
When I was waiting for the UPS guy to show up with that sprocket, I installed my headlight relay kit to improve my headlight output. Sure seems to make a huge difference just in the garage, can't wait to try it out on the road soon. Too bad it's bloody SNOWING AGAIN.
Ta-da!
Yummy master link stuff:
Close...
Looks like a messy bike with a new chain and sprocket to me!
I have to re-sync my carbs since I messed with the idle mixtures via the float heights, but she starts up without a problem.
When I was waiting for the UPS guy to show up with that sprocket, I installed my headlight relay kit to improve my headlight output. Sure seems to make a huge difference just in the garage, can't wait to try it out on the road soon. Too bad it's bloody SNOWING AGAIN.
[url=http://www.motoblag.com/blag/]Practicing the dark and forgotten art of using turn signals since '98.[/url]
-
Skier
- Site Supporter - Platinum
- Posts: 2242
- Joined: Sat Aug 07, 2004 10:44 am
- Sex: Male
- Location: Pullman, WA, USA
Well, trip has been canned, but it leaves me with more time to work on my bikes! So I'm taking a little interlude to get the Radian back up to snuff.
I just finished all the valves. Everything is in spec now.
Let's tackle those fork seals:

Getting that little hex bolt out from the bottom:

Draining the old fork oil that smells like death itself:

Ah, the new stuff. Strangely enough, 320cc of fork oil matches the top of the last ridge in this party cup!

See?

Put the new fluid aside in a safe place, break out the eye protection and let's unbolt some stored energy!

Bit of work later:

Now, since we removed that hex bolt earlier, we can remove the upper fork tube slider from the bottom part. This is an "interference fit," which means "pull that lil @#$%er until it comes apart," like so:

Finish draining the fork oil that smells like absolute death and then inspect the old parts. Yeah, this fork seal has seen better days:

See the copper that's been rubbed through to on the right? Yeah, this should be replaced in the near future. I'll get right on it, I swear!

After a bit more work, we're ready to drop our new fork seal in (MAKE SURE IT'S RIGHT -SIDE UP DON'T TRUST THE SHOP MANUAL IT'S CONFUSING. Not like that was a problem for me... ):
):

Install fork seal, carefully, with your tool of choice. In my case, it is most certainly the factory tool and not a bastrd mill file with a bit of electrical tape on the end:

When it's in there, installed the retaining clip:

Pour in the fork oil:

Button the fork all back up together, reinstall:

Look at that, one happy bad Rad, after getting new fork seals and wipers as well as valve adjustments:

Now, to get back to playing with the Kat's carbs... yay!
I just finished all the valves. Everything is in spec now.
Let's tackle those fork seals:
Getting that little hex bolt out from the bottom:
Draining the old fork oil that smells like death itself:
Ah, the new stuff. Strangely enough, 320cc of fork oil matches the top of the last ridge in this party cup!
See?
Put the new fluid aside in a safe place, break out the eye protection and let's unbolt some stored energy!
Bit of work later:
Now, since we removed that hex bolt earlier, we can remove the upper fork tube slider from the bottom part. This is an "interference fit," which means "pull that lil @#$%er until it comes apart," like so:
Finish draining the fork oil that smells like absolute death and then inspect the old parts. Yeah, this fork seal has seen better days:
See the copper that's been rubbed through to on the right? Yeah, this should be replaced in the near future. I'll get right on it, I swear!
After a bit more work, we're ready to drop our new fork seal in (MAKE SURE IT'S RIGHT -SIDE UP DON'T TRUST THE SHOP MANUAL IT'S CONFUSING. Not like that was a problem for me...
Install fork seal, carefully, with your tool of choice. In my case, it is most certainly the factory tool and not a bastrd mill file with a bit of electrical tape on the end:
When it's in there, installed the retaining clip:
Pour in the fork oil:
Button the fork all back up together, reinstall:
Look at that, one happy bad Rad, after getting new fork seals and wipers as well as valve adjustments:
Now, to get back to playing with the Kat's carbs... yay!
[url=http://www.motoblag.com/blag/]Practicing the dark and forgotten art of using turn signals since '98.[/url]
-
Skier
- Site Supporter - Platinum
- Posts: 2242
- Joined: Sat Aug 07, 2004 10:44 am
- Sex: Male
- Location: Pullman, WA, USA
Setting the fuel level, again:

Close-up:

The fuel level is supposed to be like 2 mm or so underneath the top of the carb bowl, when the bike is level and the carbs pitched forward like they are mounted on the bike. I set them to a decent chunk under the specified level since the last time I did that, grr, cylinder full of gas. I'm currently changing and flushing my oil since some is certain to have snuck by my piston rings.
To prevent that from happening again, I've done some tricky balancing to simulate the pictched-forward and tilted to the side position the carbs were at. This simulates mounted to the engine and on the sidestand. If she leaks the water in the fuel lines, I've got to find out why. If not, I should be good to go. Again.

Close-up:
The fuel level is supposed to be like 2 mm or so underneath the top of the carb bowl, when the bike is level and the carbs pitched forward like they are mounted on the bike. I set them to a decent chunk under the specified level since the last time I did that, grr, cylinder full of gas. I'm currently changing and flushing my oil since some is certain to have snuck by my piston rings.
To prevent that from happening again, I've done some tricky balancing to simulate the pictched-forward and tilted to the side position the carbs were at. This simulates mounted to the engine and on the sidestand. If she leaks the water in the fuel lines, I've got to find out why. If not, I should be good to go. Again.
[url=http://www.motoblag.com/blag/]Practicing the dark and forgotten art of using turn signals since '98.[/url]
-
skoebl

- Legendary 300

- Posts: 323
- Joined: Sun Nov 27, 2005 2:06 pm
- Sex: Male
- Location: Crescent City, CA
Man...I really wish I had the means to do stuff like that. I have to wait until I have my own house before I can do fun stuff 
Anyone in San Diego wanna be my friend and let me work on stuff in their garage with their tools and such?
Anyone in San Diego wanna be my friend and let me work on stuff in their garage with their tools and such?
SV650 K6 <---Suuper Awsome bike
[quote="V4underme"]
If I didn't feel like a monkey &*$%ing a football when I sat on a sporty, I'd probably own one.[/quote]
[quote="V4underme"]
If I didn't feel like a monkey &*$%ing a football when I sat on a sporty, I'd probably own one.[/quote]
-
Skier
- Site Supporter - Platinum
- Posts: 2242
- Joined: Sat Aug 07, 2004 10:44 am
- Sex: Male
- Location: Pullman, WA, USA
The 750 petcock has been rebuilt, seems to work fine. Carb needle seats have been polished to take care of the sticky needles possibilities. Bike runs again, no problem. I need to bolt all the plastics back on and I'm good to go for another test ride.
One thing I noticed when working on the bike: my front forks are leaking. Go figure, the one part I had the dealer do so I wouldn't have to worry about, doesn't work! I'm going to respectfully go in to said dealer and ask them what's up and how they are going to make it right. New seals are $12 a pair to my door, but I don't want to do the work, especially if I already paid for it!
One thing I noticed when working on the bike: my front forks are leaking. Go figure, the one part I had the dealer do so I wouldn't have to worry about, doesn't work! I'm going to respectfully go in to said dealer and ask them what's up and how they are going to make it right. New seals are $12 a pair to my door, but I don't want to do the work, especially if I already paid for it!
[url=http://www.motoblag.com/blag/]Practicing the dark and forgotten art of using turn signals since '98.[/url]
-
Skier
- Site Supporter - Platinum
- Posts: 2242
- Joined: Sat Aug 07, 2004 10:44 am
- Sex: Male
- Location: Pullman, WA, USA
I'll be dropping the Kat off at the shop tomorrow so they can redo the fork seals. Hopefully it'll be fine!
I had to take a trip to campus tonight (stupid university network was down, couldn't access course materials for homework). Man, that headlight relay kit is amazing! I remember riding at night with the stock wiring and it was really dark. Now, my headlight is actually useful! Truly surprising amounts of light coming out of that. I'll be installing a newer headlight bulb sometime in the near future to make it even brighter. In the mean time, I'll suggest everyone who rides at night to get one of these relay kits. You can whip up your own or purchase a pre-made one like I did (from http://www.easternbeaver.com/Home/Main/main.html ).
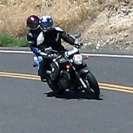
Ah yes, also got to put on another 85 miles to compliment my 100 miles yesterday. Bike is getting much better gas milage now, we're up to 39.
I had to take a trip to campus tonight (stupid university network was down, couldn't access course materials for homework). Man, that headlight relay kit is amazing! I remember riding at night with the stock wiring and it was really dark. Now, my headlight is actually useful! Truly surprising amounts of light coming out of that. I'll be installing a newer headlight bulb sometime in the near future to make it even brighter. In the mean time, I'll suggest everyone who rides at night to get one of these relay kits. You can whip up your own or purchase a pre-made one like I did (from http://www.easternbeaver.com/Home/Main/main.html ).
Ah yes, also got to put on another 85 miles to compliment my 100 miles yesterday. Bike is getting much better gas milage now, we're up to 39.
[url=http://www.motoblag.com/blag/]Practicing the dark and forgotten art of using turn signals since '98.[/url]