Page 1 of 2
My Paint Project
Posted: Fri Apr 22, 2005 6:47 am
by HypeDOG
I was hoping to leave well enough alone, but I find it's gonna be tough. It's an 82 XJ650 Seca and I'm not really fond of the color. The paint is chipped, scratched, and there was a recent gas tank patch job that is really nasty. So... I need to paint this thing.

I've only ever painted fiberglass, but that turned out fairly well. Tank, few little plastic pieces, this shouldn't take too long right?

Anyone who ever repainted their bike before, especially those that changed the color, I'd appreciate stuff to look for. I've read that plastic parts need special primers and flex agents, etc. This true? Is gas tank as easy as it seems? Sand down, prime, paint?
Thanks.
Re: My Paint Project
Posted: Fri Apr 22, 2005 10:55 am
by old-n-slow
HypeDOG wrote:
Anyone who ever repainted their bike before, especially those that changed the color, I'd appreciate stuff to look for. I've read that plastic parts need special primers and flex agents, etc. This true? Is gas tank as easy as it seems? Sand down, prime, paint?
Thanks.
The plastic parts have already got "special" primers on them. Just don't sand away all the existing paint. It is only necessary to sand the paint to "rough" it up so that the new paint adheres to the old. Use 400 grit dry paper for that or you can go down to 320 and you should be okay and not have to worry about sanding scratches showing through the finish. Sand all in one direction, not helter skelter etc..
Gas tank, whatever, no matter. Sand, no primer necessary (if recoating) except on bare metal., then apply paint. Use catylized automotive paint on the fuel tank or a spill, when refueling could lift the paint. That'll Pi$$ you off!
Posted: Fri May 13, 2005 7:44 pm
by sappsTTer
There are special primers that you can use for plastics, they're actually adhesion promoters and you spray primer over them. PPG makes one, I'm not sure off the top of my head what the product # is.
Posted: Sat May 14, 2005 4:58 am
by old-n-slow
sappsTTer wrote:There are special primers that you can use for plastics, they're actually adhesion promoters and you spray primer over them. PPG makes one, I'm not sure off the top of my head what the product # is.
Yes there are, however those special primers are only needed with NEW plastic pieces. If the part has paint on it already then it will have been primed. The biggest problem with the plastic parts is that a "release agent" is used in the manufactuing process to allow the plastic to be more easily removed from the mold. The release agent, as you might expect, makes it so stuff doesn't tend to stick to the plastic.
You don't sand all the paint off before refinishing unless the part has been painted a gazillion times and has an excessive build-up of paint. Simply sand to scratch the surface to allow the new paint to adhere and you're ready to go.
Posted: Sat May 14, 2005 7:37 pm
by mysta2
Not knowing what kind of setup you have it's hard to tell you which way to go.
One adhesion promotor that a lot of body guys I know swear by is Bulldog, I know you can get it in a rattlecan and I'm pretty sure you can also find it as a quart if you have a gun. But like old-n-slow said unless you need to sand down to the plastic to smooth out the chips it shouldn't be neccassary.
However any paint I've ever used (my usual setup: HVLP Sata KLC-B, PPG: DPS3030/DCX3055, DBC, DCU2002/DCX61 regulated at 80psi, in a sidedraft) would definiately show 400 grit scratches without a heavy fillprimer coat. You may find a primer neccassary if you'rew looking to cover a dark color with a light (or a red with anything)
If you want it to really come out nice and last you will have to put a clear coat down (something with some uv protection) PPG DCU2002 is my favorite (don't use it for bare metal though, there's another company... starts with and A... I can't remember what it is right now, but they make a great clear that will hold on bare metal) this will also give you a good chance to buff out the gritty surface left behind by the base coat if you're rattlecanning it. To buff it you need to lay down a good coat of clear then go at it with wet 1500-2000, polishing compound, buff, then wax. And I guess this should be obvious but to guide your' sanding make sure that the debris stays white, if it turns toward your' base color you've broken though the clear and that spot is no longer protected.
Posted: Sun May 15, 2005 5:10 am
by old-n-slow
BTW. I have painted hundreds of cars sanded with nothing finer then 320 grit and the sand scratches don't show. The trick is to sand everything in one direction , not helter skelter (those will show) 400 grit will do fine. If you want, then resand with 600. Don't go too fine or you will not get the adhesion you are looking for. Been there done that.
Posted: Fri May 20, 2005 3:57 am
by mysta2
what kind of paint do you shoot? do you prime after sanding or shoot straight color? are you clearing it?
Posted: Sat May 21, 2005 1:23 pm
by ronboskz650sr
If the patch is really rough, you're in for some sanding, and may break the paint in the process. If you do, use adhesion promoter, followed by primer, and surface with 400 before you paint. If there's rust on the tank, you can use phosphoric acid (rustmort, or other products) to convert it to black oxide, then prime and paint. There are many possibilities here...I'd recommend a trip to the library and follow one book's process from start to finish. Here's our current project, with partial buffing:
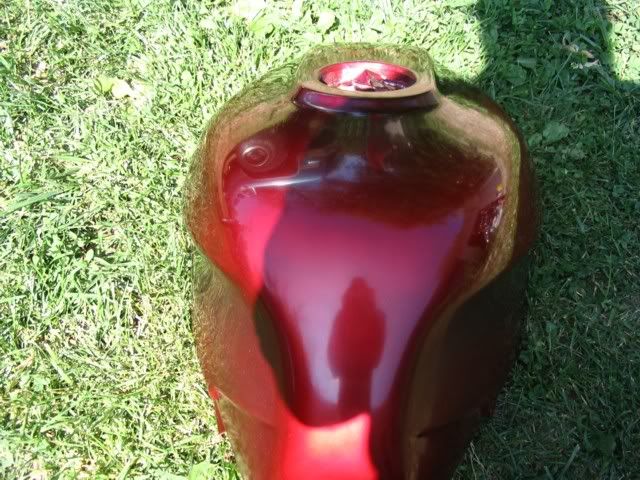
We used some of what you've already read here, and several things you haven't. It just depends on your pieces, and your experience with this sort of thing. The nice thing is, you can always redo it if you don't like it.
BTW, this is a rattlecan job (it's true).
Posted: Sat Jul 23, 2005 6:07 pm
by eugeart
I just painted a fairing today following advice in this forum. Came out really nice!! Total time invested- 3 hours. I'd say with some care you'd get excellent results (professional looking) following the guidelines these guys lay out.
Besides, the nice thing about doing it youself, Its cheap (cost me $17.28US), fun and fast. Did I say cheap? If you mess up start over, it won't be like you paid someone hundreds to do a dubious job of it.
Posted: Wed Jul 27, 2005 5:04 am
by old-n-slow
mysta2 wrote:what kind of paint do you shoot? do you prime after sanding or shoot straight color? are you clearing it?
I missed this earlier. I have sprayed dupont, sherwin williams, ppg (and a few others I can't recall just now.), stand alone colors and clear coats. I have cleared standard basecoats and cleared over gloss color coats -- all the same -- if you know what you are doing.

Not necessary to prime after sanding except for areas where body filler has been applied or there is bare metal. (this all depends on the result you are looking for. Are you seeking a show car type finish or simply something that looks good and is durable enough to last?) If you want show car quality ---- take it to a pro. I shoot a sealer before color coating, if possible and I tint the sealer to approximate the color. By doing that you can save a coat of paint without worry of dark/light areas.
If changing color, I recommend that you sand thoroughly and then prime with a catylized primer. Then you must sand before spraying. (That is if you are looking for the best of jobs)
I recently shot my motorcycle tank (black) with a good quality non-automotive urathane as an experiment. Total cost of paint actually used, about $1.00. So far it seems to be standing up very well. Totally resistant to gas spills as far as I can tell although I always do my best to avoid splashing on the tank.