Decided to use the upholstery shop...
-
ronboskz650sr

- Legendary 750

- Posts: 995
- Joined: Thu Sep 02, 2004 2:36 pm
- Sex: Male
- Location: Sedalia, Mo
Decided to use the upholstery shop...
Well, after a quick ride to the shop, and a 40-65 dollar estimate, depending on features, I'v decided to get a professional upholstery job on my seat. The tailpiece just looks too good, and my efforts aren't producing similar results on the seat cover. So, I'll post some pics of the cushion carving/buildup, and the final cover after i get it done.
Ride safe...God bless!
-Ron
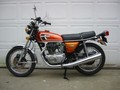
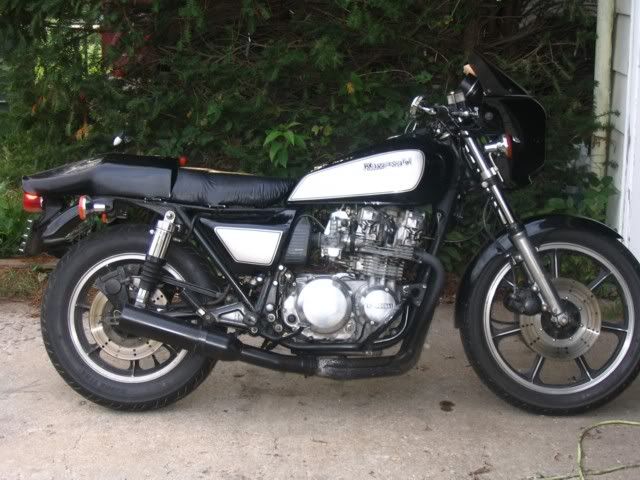
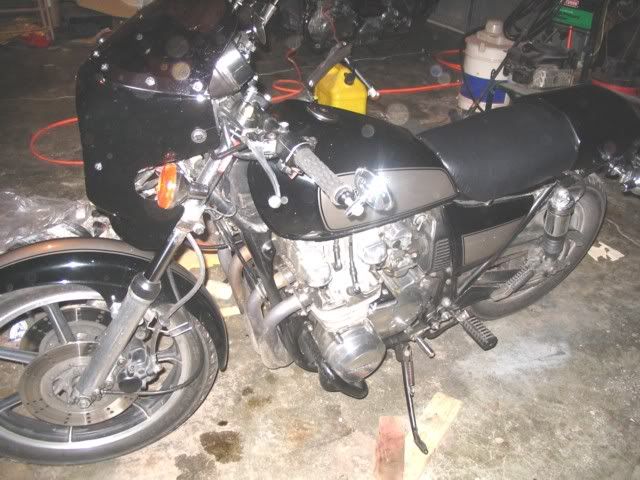
[img]http://img.photobucket.com/albums/v398/ronboskz650sr/avatartotal.jpg[/img][img]http://img.photobucket.com/albums/v398/ronboskz650sr/wholebikeavatar2.jpg[/img]
-Ron
[img]http://img.photobucket.com/albums/v398/ronboskz650sr/avatartotal.jpg[/img][img]http://img.photobucket.com/albums/v398/ronboskz650sr/wholebikeavatar2.jpg[/img]

-
ronboskz650sr
- Legendary 750
- Posts: 995
- Joined: Thu Sep 02, 2004 2:36 pm
- Sex: Male
- Location: Sedalia, Mo
I'm a little bummed to give up, but I'm just getting sick of this project. My patience is wearing thin as I give up what used to be riding time for project time. If work was going a little better, this would have been done a couple weeks ago, and I might still be experimenting with sewing a cover...the second one did come out better than the first. Just getting tired of it, especially since I road tested the padding yesterday. Now I really want to ride, and I will today. I see the sun peeking through a little right now.
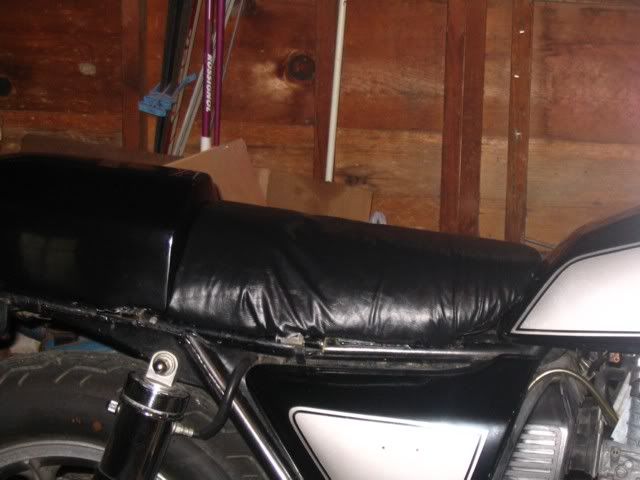
I just can't get a clear picture of how to get around this hinge, and it causes all the other ripples. Until I actually staple it down, it stretches smooth, so I'm obviously missing something. I think we pay people to relieve our own aggrvation.
I just can't get a clear picture of how to get around this hinge, and it causes all the other ripples. Until I actually staple it down, it stretches smooth, so I'm obviously missing something. I think we pay people to relieve our own aggrvation.
Ride safe...God bless!
-Ron
[img]http://img.photobucket.com/albums/v398/ronboskz650sr/avatartotal.jpg[/img][img]http://img.photobucket.com/albums/v398/ronboskz650sr/wholebikeavatar2.jpg[/img]
-Ron
[img]http://img.photobucket.com/albums/v398/ronboskz650sr/avatartotal.jpg[/img][img]http://img.photobucket.com/albums/v398/ronboskz650sr/wholebikeavatar2.jpg[/img]
-
ronboskz650sr
- Legendary 750
- Posts: 995
- Joined: Thu Sep 02, 2004 2:36 pm
- Sex: Male
- Location: Sedalia, Mo
I rode 105 miles through the country, on the expressway, on dirt and gravel (over hill and dale), twistys, straights, rough pavement....the first 65 miles were pretty brutal. I'm not sure if the cushion is too firm, or if I'm out of shape for riding. My miles are way down since I started building this seat. After a leg stretch and a mountain dew, comfort returned, and i analyzed the riding positions...They are all great! Much improved from stock, both in handling (forward position), and cruise comfort (rearward, 80 mph nice stretch and forward lean position), and everywhere in between. I'll just need to ride more to figure out the firmness issue...and what could be better than that! Here's a better fit using some spary adhesive inside the cover. I'm going to be riding a while before I get it covered, and this looks a tad better.
My daughter's suggestion, and I took it. I wasn't using the adhesive, because I've been working in the dining room. It's nice out today. Improved enough to ride around a few days.
My daughter's suggestion, and I took it. I wasn't using the adhesive, because I've been working in the dining room. It's nice out today. Improved enough to ride around a few days.
Ride safe...God bless!
-Ron
[img]http://img.photobucket.com/albums/v398/ronboskz650sr/avatartotal.jpg[/img][img]http://img.photobucket.com/albums/v398/ronboskz650sr/wholebikeavatar2.jpg[/img]
-Ron
[img]http://img.photobucket.com/albums/v398/ronboskz650sr/avatartotal.jpg[/img][img]http://img.photobucket.com/albums/v398/ronboskz650sr/wholebikeavatar2.jpg[/img]
-
ronboskz650sr
- Legendary 750
- Posts: 995
- Joined: Thu Sep 02, 2004 2:36 pm
- Sex: Male
- Location: Sedalia, Mo
Okay, I'm starting to get the hang of the upholstery thing...If I can figure out how to get around the hinge on the otherr side, I may be able to save the money...but for now I'm still testing cushion firmness...this one is a soft cushion with a firm insert to prevent bottoming on the pan, and the vinyl is quite smooth  .
.
Ride safe...God bless!
-Ron
[img]http://img.photobucket.com/albums/v398/ronboskz650sr/avatartotal.jpg[/img][img]http://img.photobucket.com/albums/v398/ronboskz650sr/wholebikeavatar2.jpg[/img]
-Ron
[img]http://img.photobucket.com/albums/v398/ronboskz650sr/avatartotal.jpg[/img][img]http://img.photobucket.com/albums/v398/ronboskz650sr/wholebikeavatar2.jpg[/img]


I think I know what your stretching problem is. I've had the same when I stretch canvas to paint on (I'm an artist).
When you go to staple- work from the middle of each side. As you stretch it towards the lip pull it tight (snugly- don't overdo it) away from the midline (your original two staples) and towards the front. Continue back and forth from each side and going alternately from front to back. Work your way oppositely from each prior staple. Depending on the shape of your seat your last staples should be in the front and rear respectively.
The more rectangular and wider the seat put your first four staples at each point of the compass and stretch as described working out to the corners.
This will keep the areas between the staples taut so you won't get that rebounded wrinkle effect. I've stretched my own seats and foud that it works.
The only time I feel any real catharsis is on a MOTORCYCLE!
1993 GSX 750F Katana; 1983 CBX 550F
[img]http://home.grandecom.net/~eugeart/PIX/CBXfinal1.jpg[/img]
1993 GSX 750F Katana; 1983 CBX 550F
[img]http://home.grandecom.net/~eugeart/PIX/CBXfinal1.jpg[/img]
-
ronboskz650sr
- Legendary 750
- Posts: 995
- Joined: Thu Sep 02, 2004 2:36 pm
- Sex: Male
- Location: Sedalia, Mo
That seems right...the only difficulty right now is that hinge on the one side. It's hard to stretch around it, and if I cut around it, the cutout moves as I stretch to remove the wrinkles near it. This is complicated by the sewn panel in the front that needs to be pulled down so the stitching disappears under the nose where it meets the tank. Oh, and I have to figure out how to fasten down the rear with no access behind the foam...I think I'll make it extra long and staple it down before the cushion goes on, but then the first stretch needs to be back to front. Do you think that will work?
Ride safe...God bless!
-Ron
[img]http://img.photobucket.com/albums/v398/ronboskz650sr/avatartotal.jpg[/img][img]http://img.photobucket.com/albums/v398/ronboskz650sr/wholebikeavatar2.jpg[/img]
-Ron
[img]http://img.photobucket.com/albums/v398/ronboskz650sr/avatartotal.jpg[/img][img]http://img.photobucket.com/albums/v398/ronboskz650sr/wholebikeavatar2.jpg[/img]
As far as the hinge goes, why not make a little slit to poke it through the vinyl? Or you might try starting your stretching around the hinge first. Or even better, if you can- remove the hinge and reattach it after stretching!
Otherwise, front to back for the first stretch would work as long as you then work from the middle out from each of the longer edges. Make sure its a good firm stretch since every next stretch will be based upon it. If the subsequent stretches are even tighter than the middle it will loosen between the staples directly to either side. Hard to picture but thats how it works.
Place your first staples in the midline of each side. Place your finger halfway to the end from there and stretch towards the lip and towards the corner simultaneously. Staple where you had your finger. Repeat on each side working out from the middle. You will next stretch (straight out) will be between each staple. Then divide the space beteen the corner and the closest staple and stretch out and towards the corner. This entire process (further subdividing the spaces between the staples) is repeated until you reach the corners.
Sometimes I work on real narrow canvases, similar to a seat. The ratios length to width are not ideal yet most importantly you must stretch out evenly to the corners obviously devoting more time to the long side. That way the tension is focused from the center to each corner evenly and that eliminates wrinkles for the most part. I've also found that a consistent spacing of staples goes a long way to preventing wrinkles while maintaining even tension.
Last edited by eugeart on Sat Sep 17, 2005 5:33 pm, edited 2 times in total.
The only time I feel any real catharsis is on a MOTORCYCLE!
1993 GSX 750F Katana; 1983 CBX 550F
[img]http://home.grandecom.net/~eugeart/PIX/CBXfinal1.jpg[/img]
1993 GSX 750F Katana; 1983 CBX 550F
[img]http://home.grandecom.net/~eugeart/PIX/CBXfinal1.jpg[/img]


-
ronboskz650sr
- Legendary 750
- Posts: 995
- Joined: Thu Sep 02, 2004 2:36 pm
- Sex: Male
- Location: Sedalia, Mo