Honda 599 New to Now

-
Sev
- Site Supporter - Gold

- Posts: 7352
- Joined: Sun Jun 06, 2004 7:52 pm
- Sex: Male
- Location: Sherwood Park, Alberta
Well... that would be possible, but I'd need to remove one of the swingarm mounts

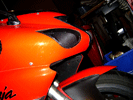
If you look at the side of the bike the footpegs mount to a large metal plate. that plate holds the swingarm in place. This plate covers part of the chain, and basically makes it impossible to remove in one piece. So, I ground the pins off one link, popped the clip out, annnnnd then pull it out of the swingarm.
Done and done, now I'm waiting for a new chain and sprockets. Should be here Friday at the latest.
Of course I'm generalizing from a single example here, but everyone does that. At least I do.
[url=http://sirac-sev.blogspot.com/][img]http://i12.photobucket.com/albums/a227/Sevulturus/sig.jpg[/img][/url]
[url=http://sirac-sev.blogspot.com/][img]http://i12.photobucket.com/albums/a227/Sevulturus/sig.jpg[/img][/url]
-
Skier
- Site Supporter - Platinum

- Posts: 2242
- Joined: Sat Aug 07, 2004 10:44 am
- Sex: Male
- Location: Pullman, WA, USA
Yep, grinding off a link is the easiest and fastest way to do it. Put some kind of shield around the bearing areas, spend 10 minutes with a Dremel (or 60 seconds with an angle grinder  ), push the remainder of the link through and remove the chain. Real easy, as you've discovered.
Keep up the great work, Sev. Sounds like you're enjoying yourself while learning a lot.
And why didn't you respond to my email?
One last thing: You should look into how to get some highway pegs mounted! I need to do that on my bike, my knees give me hell being cooped up in their current position. Some minor fabrication work would allow for some pegs to be mounted towards the front, by installing a bracket where the front of the motor bolts up to the frame. Do this so I don't "have" to buy a welder and have at it.
[url=http://www.motoblag.com/blag/]Practicing the dark and forgotten art of using turn signals since '98.[/url]
-
Sev
- Site Supporter - Gold
- Posts: 7352
- Joined: Sun Jun 06, 2004 7:52 pm
- Sex: Male
- Location: Sherwood Park, Alberta
E-mail? What e-mail?
I'd already removed the rear wheel, front sprocket and brake before I got around too taking the chain off. All I needed was a guard to make sure I didn't throw sparks onto someone elses bike. A small piece of steel was all it took. 30 seconds with an angle grinder and it slid right out.
Along with about 2 lbs of built up grease, dirt and assorted rocks. I can't believe how much "poo poo" was in around the front sprocket. It's worth checking out btw... there isn't any way to get the crap out once it's in, so it just collects.
While the wheel was off I pulled off the rear sprocket, and cleaned my rim. That rim hasn't seen soap and water in over a year. Probably 1/8th of an inch of flung off lube and assorted road grime on that thing. Believe it or not my grey rim is actually a black/silver/slightly sparkly one. Well it looks black from a distance, but it shimmers under the light up close. Very cool.
Anyways, I'm now waiting for parts to arrive. Heh, hopefully they'll get here soon, as there's no way I'm putting my old one back on.
As for highway pegs, who needs em? Not I
If I remember to take some pictures I'll post them tomorrow showing you how and where to mount yourself some highway pegs. It won't be all the comfortable, but all you'll need is some spare pegs and a couple peices of straight iron.
Of course I'm generalizing from a single example here, but everyone does that. At least I do.
[url=http://sirac-sev.blogspot.com/][img]http://i12.photobucket.com/albums/a227/Sevulturus/sig.jpg[/img][/url]
[url=http://sirac-sev.blogspot.com/][img]http://i12.photobucket.com/albums/a227/Sevulturus/sig.jpg[/img][/url]
-
Skier
- Site Supporter - Platinum
- Posts: 2242
- Joined: Sat Aug 07, 2004 10:44 am
- Sex: Male
- Location: Pullman, WA, USA
I sent you one a while ago with my new gmail account, since I'm moving all my contacts over to it. A more professional address than my last one.Sevulturus wrote:E-mail? What e-mail?
I take off the plastic sprocket gaurd probably once a month and attack that area with diesel, a toothbrush and some Simple Green. Looks much better after doing that.Sevulturus wrote:Along with about 2 lbs of built up grease, dirt and assorted rocks. I can't believe how much "poo poo" was in around the front sprocket. It's worth checking out btw... there isn't any way to get the "crumb" out once it's in, so it just collects.
Excellent. I ain't looking for fancy, my bike is for ridin'.Sevulturus wrote:As for highway pegs, who needs em? Not I
If I remember to take some pictures I'll post them tomorrow showing you how and where to mount yourself some highway pegs. It won't be all the comfortable, but all you'll need is some spare pegs and a couple peices of straight iron.
Now to hurry up and order that welder, anyways.
[url=http://www.motoblag.com/blag/]Practicing the dark and forgotten art of using turn signals since '98.[/url]
-
Sev
- Site Supporter - Gold
- Posts: 7352
- Joined: Sun Jun 06, 2004 7:52 pm
- Sex: Male
- Location: Sherwood Park, Alberta
Okay, well to mount highway pegs all you need to do is weld a couple of footpegs onto some straight iron. Then drill a hole in the other end. I suspect that you'll want to make it about 8mm in diameter.
Behind the rad on either side there are two engine mount bolts. They go through a bolted on frame member and into the engine block itself. This is where you normally attach frame sliders... if you want them. Now it's your turn. Figure out how high you want the pegs to be, and where you want them placed. Cut your iron to an appropriate length, if you're bored maybe saw some cool designs into it and mount it. Best of luck to you mate.
Behind the rad on either side there are two engine mount bolts. They go through a bolted on frame member and into the engine block itself. This is where you normally attach frame sliders... if you want them. Now it's your turn. Figure out how high you want the pegs to be, and where you want them placed. Cut your iron to an appropriate length, if you're bored maybe saw some cool designs into it and mount it. Best of luck to you mate.
Of course I'm generalizing from a single example here, but everyone does that. At least I do.
[url=http://sirac-sev.blogspot.com/][img]http://i12.photobucket.com/albums/a227/Sevulturus/sig.jpg[/img][/url]
[url=http://sirac-sev.blogspot.com/][img]http://i12.photobucket.com/albums/a227/Sevulturus/sig.jpg[/img][/url]
-
Sev
- Site Supporter - Gold
- Posts: 7352
- Joined: Sun Jun 06, 2004 7:52 pm
- Sex: Male
- Location: Sherwood Park, Alberta
So, this is a quick note to say that you should know your tools before you attempt to know them. I recently installed a new chain and sprockets, and because I wasn't familiar with the stuff I was using I managed to ruin a master link, and basically spend 4 hours doing a simple job. Damn!
Good thing I bought an extra master link ($7.00) when I ordered my new chain. Anyways, I was using a chain breaker/installer tool with a couple of attachements that let you force the master link through, the new sideplate on and peen out the rivets.
There is one back plate that allows you to push the rivet through without crushing it, and one that holds the rivets in place while you're peening them. I made the mistake of using the wrong backing plate, and this allowed me to crush the sideplate into the o-ring and basically squish them out the sides locking the whole link in place so it wouldn't bend. This meant that it was basically worthless, I had to push the whole thing out and install the spare.
I could have saved myself about 2 hours worth of work if I had just used the correct backing plate to peen the rivets. But I suppose it is a lesson learned, and learned well. You learn more from making a mistake then doing it wrong and all that, HAHA sigh.
The good news is that I got my new chain and sprockets installed, I just need to adjust the slack on the chain and it'll be good to ride. It's sooo shiny. When I removed the old chain I honestly thought it was black. Turns out it was silver, shiny silver, so is the replacement chain for that matter.
Hopefully the snow will stop over night and it'll be nice enough out tomorrow to take it for a test ride.
Of course I'm generalizing from a single example here, but everyone does that. At least I do.
[url=http://sirac-sev.blogspot.com/][img]http://i12.photobucket.com/albums/a227/Sevulturus/sig.jpg[/img][/url]
[url=http://sirac-sev.blogspot.com/][img]http://i12.photobucket.com/albums/a227/Sevulturus/sig.jpg[/img][/url]
-
blues2cruise
- Moderator

- Posts: 10184
- Joined: Fri Apr 22, 2005 4:28 pm
- Sex: Female
- Years Riding: 16
- My Motorcycle: 2017 Africa Twin 1000cc
- Location: Vancouver, British Columbia
I'm glad to hear you learning well. Attention to detail....very important.
I took my bike in for it's 25,000km service. Yes, it is very expensive. they did the steering bearings at this service and while I was down in California, dr-bar noticed that the big allen bolts on the front forks/triple tree/steering column or whatever it is called were loose. Loose to the point of if I had ridden one more mile, they may have fallen out.
Dr-bar tightened them up as best he could,but we stopped into Berkely Yamaha so they could tighten them properly.
I will be seeing the Yamaha dealer this coming week about this......
Keep up the good work.
-
Sev
- Site Supporter - Gold
- Posts: 7352
- Joined: Sun Jun 06, 2004 7:52 pm
- Sex: Male
- Location: Sherwood Park, Alberta
blues2cruise wrote:I'm glad to hear you learning well. Attention to detail....very important.
I took my bike in for it's 25,000km service. Yes, it is very expensive. they did the steering bearings at this service and while I was down in California, dr-bar noticed that the big allen bolts on the front forks/triple tree/steering column or whatever it is called were loose. Loose to the point of if I had ridden one more mile, they may have fallen out.
Dr-bar tightened them up as best he could,but we stopped into Berkely Yamaha so they could tighten them properly.
I will be seeing the Yamaha dealer this coming week about this......
Keep up the good work.
Yes, I would definately go talk to them about that. At class we're taught that if it's not perfect it's not good enough. To that end, a drop of brake fluid on a caliper means you didn't complete the job. Forgetting to torque a single nut means you didn't complete the job. No cotter pin... it's a failed job etc etc etc. One of our instructors has a shirt that read, "you just killed your customer." And he wears it a lot. Everything HAS to be perfect.
One of the problems that I ran into adjusting my chain was that I don't weigh enough for factory specs. Which is to say that when they say 35mm of freeplay that is for someone who weighs more then I do. So when I sit on it, the chain can still slap the swingarm. I had to take it down to 28mm of freeplay to put it within safe use for myself as the rider. How's that for attention to detail?
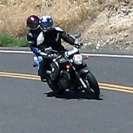
It's Oct 16/06 and there's snow on the ground... quite a bit actually. And I've just installed a new chain/sprockets. What does this mean? Well you gotta test it! So I went for a ride.
You'll note the safety gear: Leather hat, long sleeved shirt, cargo pants, and a pair of steel toe work boots. I'm totally ready to ride!
Strap down
Warming up the engine
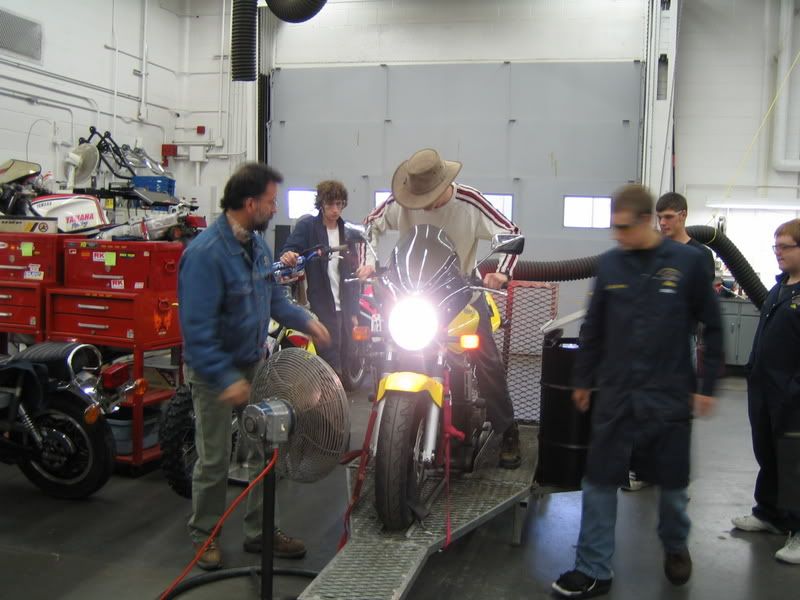
Shove the front end down
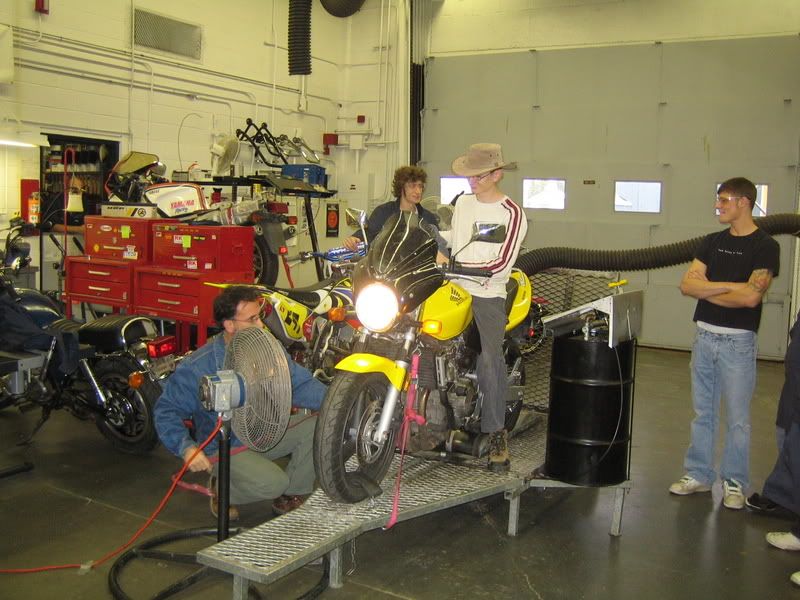
Friggin give 'er
So, it was really just a quick check to make sure that I got the chain on there correctly. It was a tiny bit tight, but hammering it around a little loosened it up
We took it really easy at first to make sure that I didn't throw a chain into my crankcase, but it held up real nice. Which is good despite my previous screw ups. I'm going to take another look at it after lunch. It was weird actually getting to hear what my bike sounds like instead of the scream of the wind. I didn't end up winding it out, but I did hit 180kmh in 6th at 7000rpm. Which means I still had 6000 to go, and it doesn't really make peak power until 10000 anyways. I love my bike.
Of course I'm generalizing from a single example here, but everyone does that. At least I do.
[url=http://sirac-sev.blogspot.com/][img]http://i12.photobucket.com/albums/a227/Sevulturus/sig.jpg[/img][/url]
[url=http://sirac-sev.blogspot.com/][img]http://i12.photobucket.com/albums/a227/Sevulturus/sig.jpg[/img][/url]